How to Stamp Silverware Tutorial
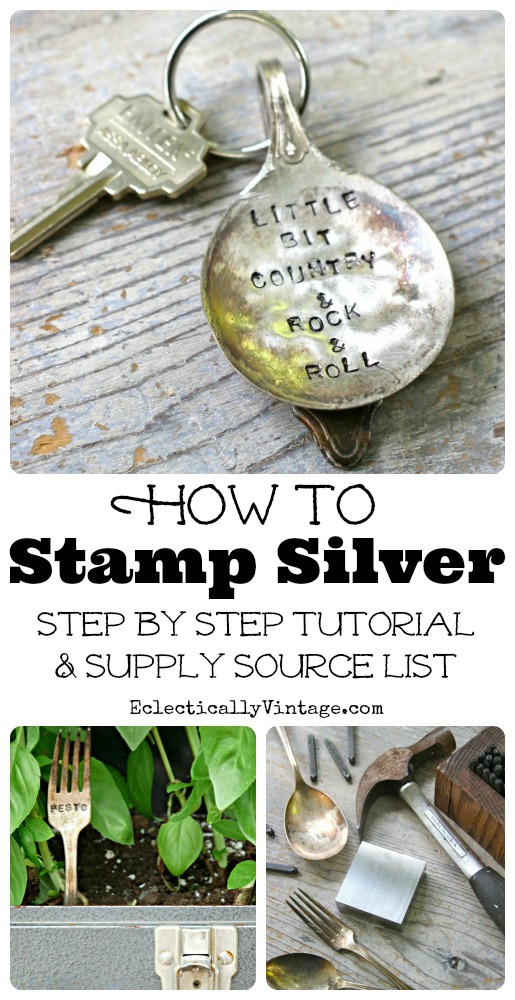
I came bearing gifts. And I want everyone to know how to stamp silverware!
To the Country Living Fair that is.
Remember when I met with the editor-in-chief of Country Living magazine?
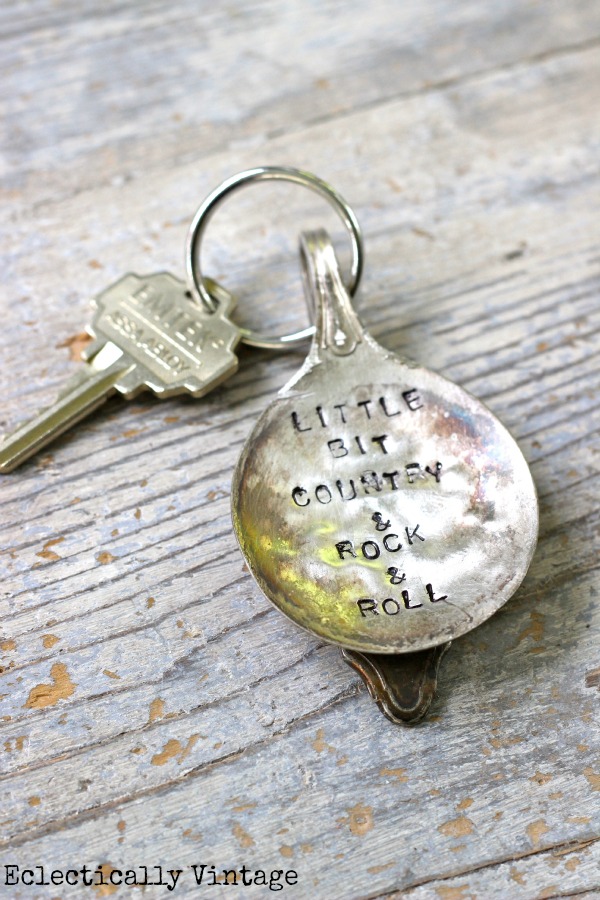
Well, I didn’t want to go empty handed so I handed her a handmade stamped silver keychain any country girl would love.
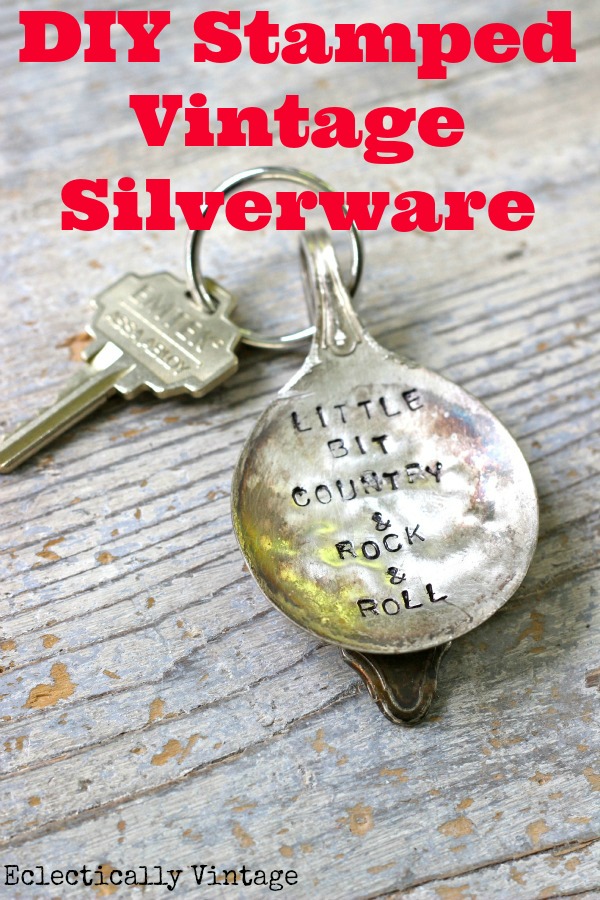
How to Stamp Vintage Silver (& Make a Spoon Keychain)
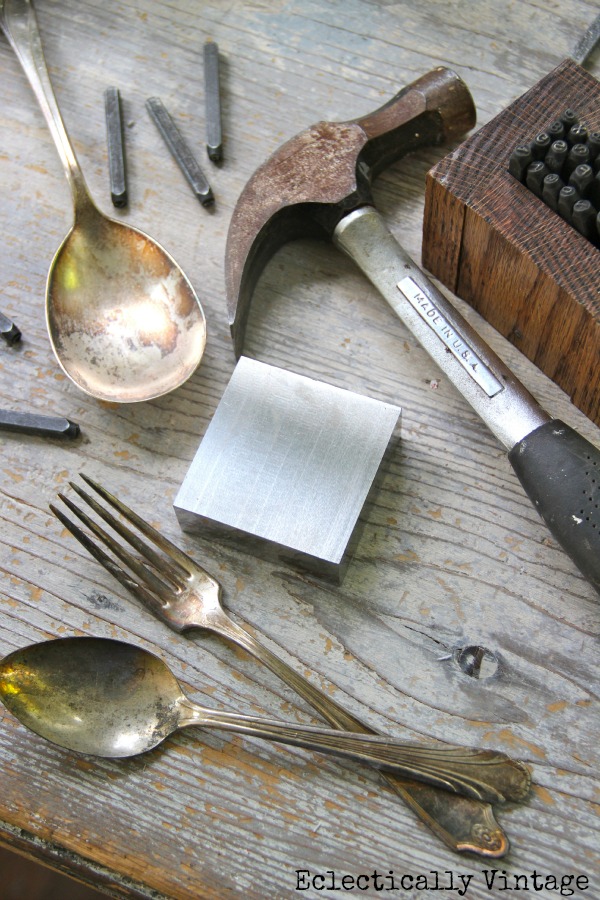
Supplies (to make a keychain):
- Silver stamping alphabet set
- Silver stamping block
- Dish towel
- Hammer
- Vintage silver spoon (stainless won’t work – it’s to hard)
- Key rings (Michael’s)
- Channel lock pliers
- Sharpie marker – black
- Scrubbie sponge
*Contains affiliate links
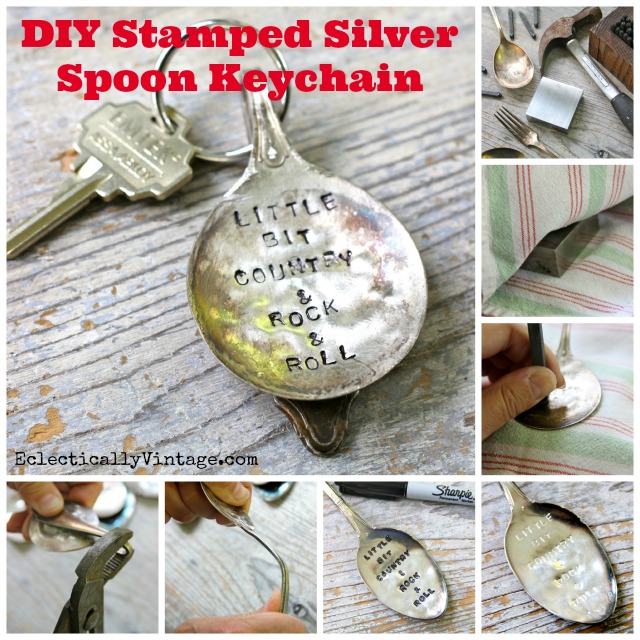
1) Wrap dish towel around stamping block (I like to do this so my spoon won’t slip and use an old one – it will get torn)!
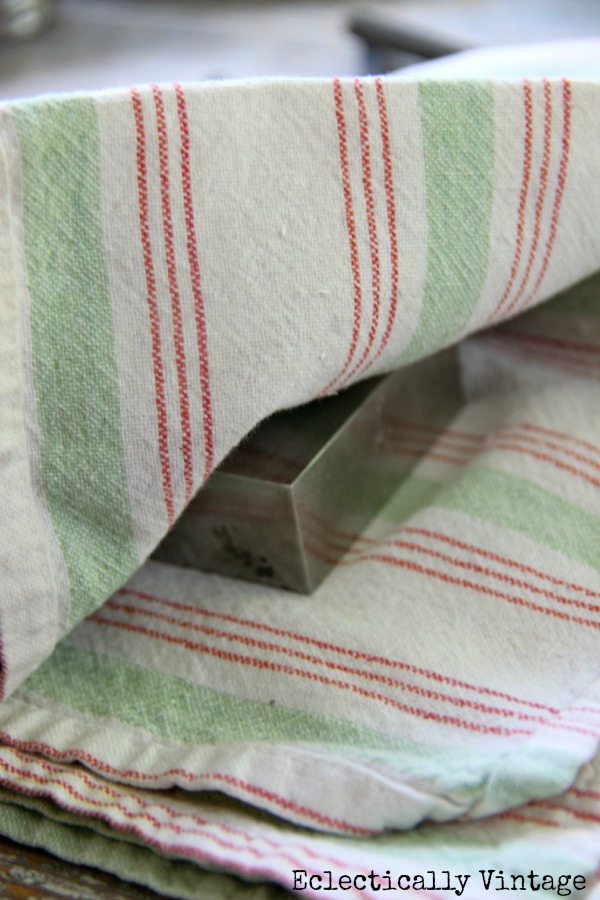
2) Pound the spoon with a hammer until it’s flat – it won’t be completely smooth but that’s a good thing
3) Put stamp on silver spoon and hit with a hammer about 10 times (don’t be shy – whack that thing hard)!
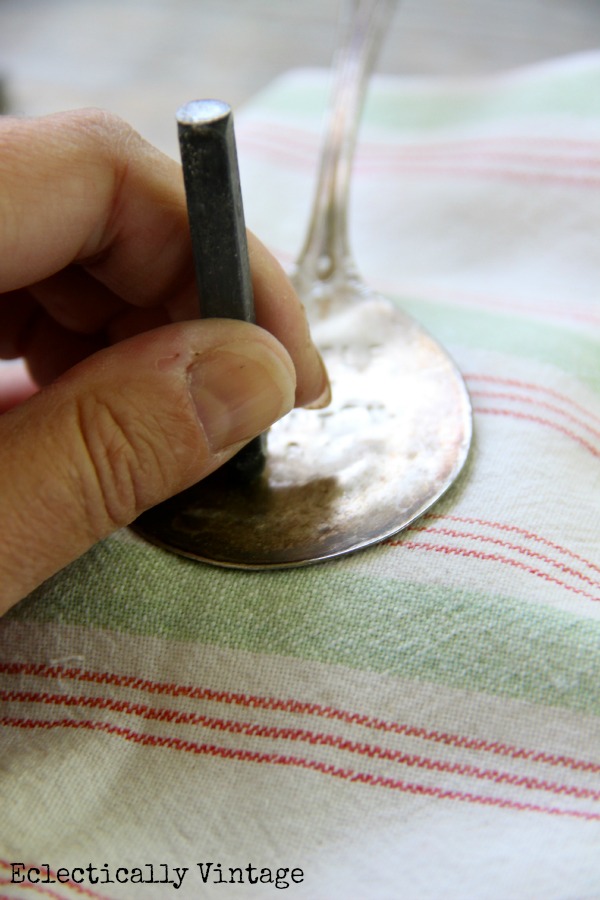
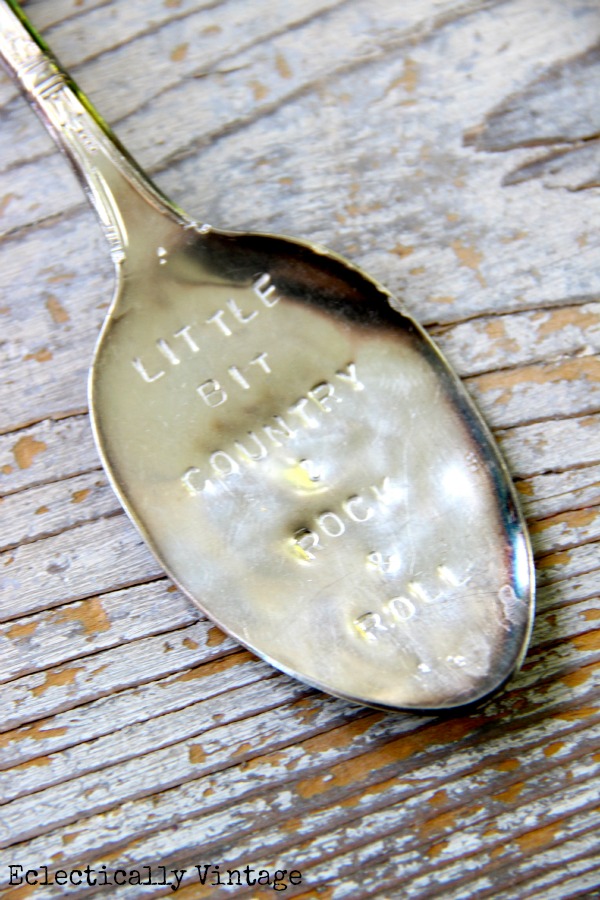
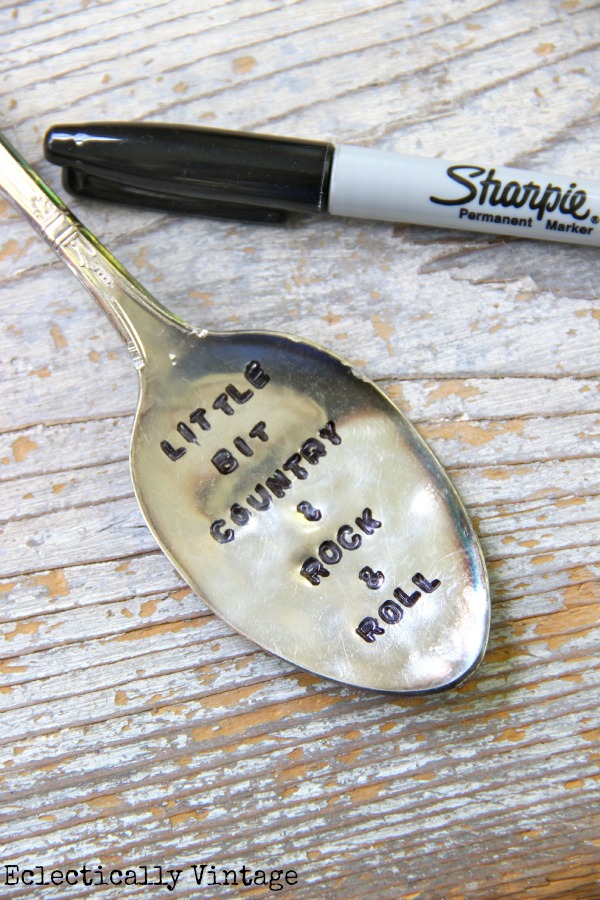
4) Trace over letters with a black Sharpie marker
5) Scrub excess marker off with a scrubbie sponge
6) Bend spoon with your mind – if you can’t do that, just use your hands (it’s easy).
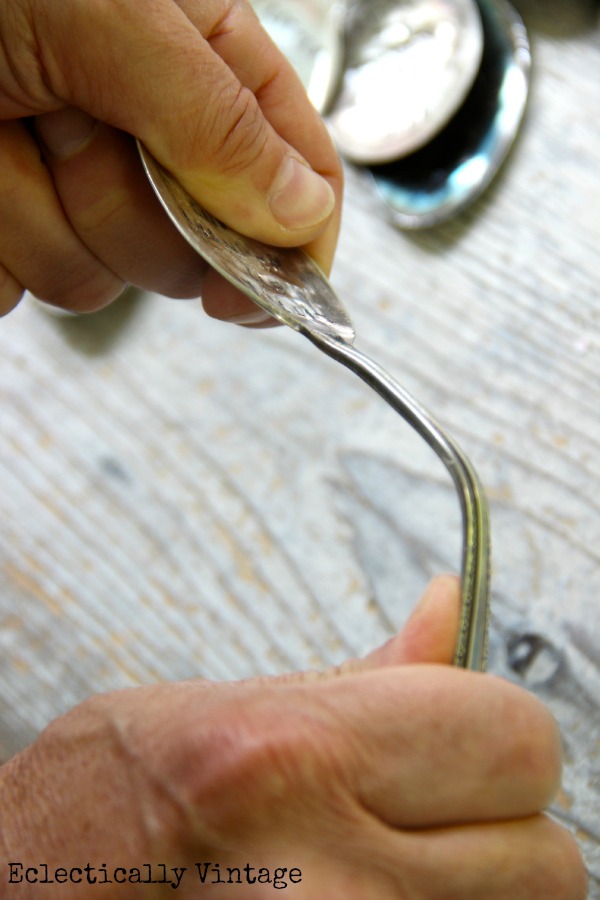
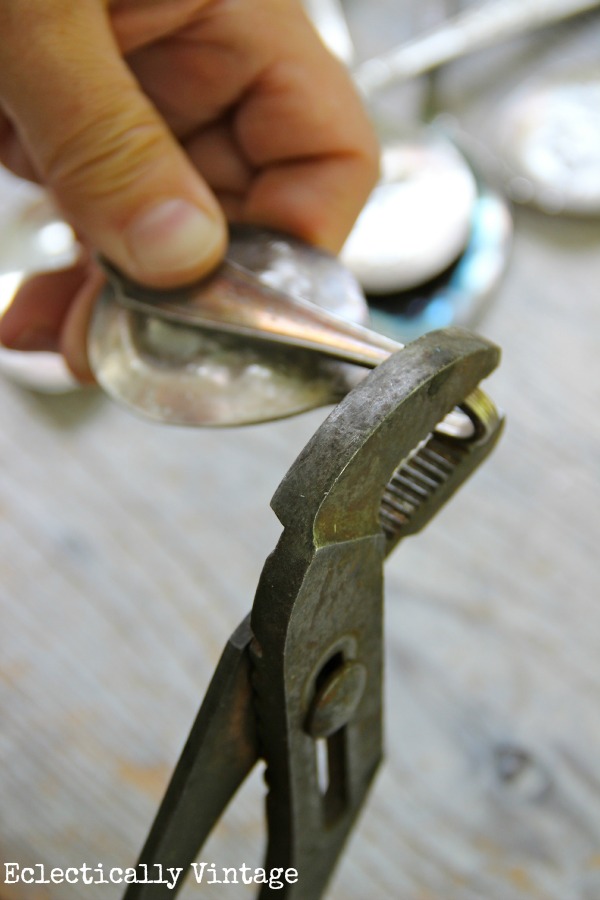
7) Slip keyring onto spoon handle then use channel lock pliers to squeeze the handle shut so the keyring won’t fall off.
8) Add your keys and go for a drive in the country.


Fabulous! I was thrilled to see this because I love those but questioned how it was done. now I know and I’m so excited. I will be buying the needed items soon. Pinning!
Kalamity Kelli~
If you have an harbor freight in your area, I have bought my block and letters and shop hammer from there and did save a little money. I was also lucky and found a alpha set and a number set at a flea market for dirt cheap! Have fun and happy creating!
Harbor Freight…never wouild have thought about them….thanks for the good idea
Was the letter stamping on silverware done with 1/8″ or 1/4″?
Hi
I just purchased a bunch of spoons from the Elephant Trunk Flea Market and I wanted to make something stamped also but didn’t know how to. Thanks so much for showing us. I am going to try making one today. I d have a stamp set.
Happy day!!!
deezie
OOOOWWWW- Did my search on etsy and amazon (am I allowed to admit I search there too?) Found several awesome set of stamps. Your block looks like it is solid metal, I found several hard rubber ones- for a good price. Wonder if yours is metal?? And if rubber would be tough enough?? One benefit, wouldn’t have to wrap a towel around it, Looks like it would stick on anything (before I hammered it down). What do you think? I Have no experience with metal stamping. Alot of people selling stamped stuff but you are the first I have seen give directions. Thank You!
I don’t know if the rubber block will work Terri – I’ve never seen one.
The metal blocks are the only ones that I have found that work…..I bought mine at Harbor Freight, along with my stamps and shop hammer.
I tried a lot of things before giving up and buying a metal block. Once I used it, it made sense as to why a metal block is the only one to use. I tried a lot of things including my concrete front porch. That was uncomfortable and cold!
The reason why you need to use a metal block is because you need something behind the piece and the stamp to STOP the downward motion. Heavy concrete and a thick metal block works and you will have a feeling of success.
As far as as stamping more than once, I recommend against that as slippage is possible and therefore a double image occurs. However, if you purchase a very heavy hammer or a bench sledge hammer, 5# or more which is what I use, and bring it down good, you won’t have to hit it more than
once.
I hope this helps. Only giving experienced advice.
Kelly, love this and have never tried it, but want to! It looks fantastic and thank you SO much for sharing the how-to with us. Pinning and have a wonderful day!
I love this! you are so funny,,, love the bend with your mind 🙂
Love the key ring! Totally vintage…..mine would have to say….I’m a lot of country….but I’m ready to rock and roll!
Have a great day rock star!
karianne
Too awesome, Kelly! I bought a silver stamping set off Pick Your Plum about 2 months ago and have yet to try it out — now I’m inspired!
xo Heidi
Hi Kelly, you make it look so easy. I’m sure that’s a lot of pounding but as they say, no pain, no gain. I have always loved everything made from old silverware. I am going to have to give this one a go. TFS!! You do rock!
That is so cute Kelly. I love everything about it.
Totally LOVE this! I have seen it around, but have never bought the supplies and given it a try. . . Maybe stamping tools will be on my birthday wish list this year? 🙂 Life to the full! Melissa
Cool…I’ve wanted to do this for a long time…but have never priced out the ‘tools’. Pretty cheap….with great end results. TFS.
I have metal stamps, but not a metal block. Duh!! No wonder I wasn’t having any luck!! Thanks for the tutorial. I’m off to buy a metal block.
Oh, and I guess I’ll ditch the stainless spoons I’ve been collecting. Good to know!
super cool and super unique!!! Love it Kelly! Been MIA for a while, but I’m back! 🙂
I love stamped silver! So many things you can make from pieces like this! Thanks for the great tutorial! I have looked for a stamping kit before but haven’t found one in my area. I may have to go online for a source. Hugs, Leena
I am able to bend inanimate objects with my mind, it’s a gift, but I have trouble touching my toes. However I do stamp stuff, so how come I’ve never made anything for myself? I’ll get on that.
Bliss
I am missing the necessary tools! I have the stamps, but not the hammer and the block. Will get on this today. I have so many key chains, garden markers and all kinds of things that need labeling with my vintage silverware collection. I want 10 of these spoons on my key chain just for myself. LOVE!
I pinned this, trying to share on FB, but it keeps wanting to pull your post on choosing the right paint color. Ugh, sometimes Facebook is so two faced.
I LOVE this Kelly! I am saving this for my new garden, I think it would be great for plants!
Cynthia
Ooooh, so clever! I’ve had a jeweler’s block for years now, and have used it maybe once. And, I’ve been eyeing the alphabet sets. Hi ho, hi ho…off to the craft shop I go.
I did the spoon bending/mind exercise once. Felt so cool that I could do it.
Sue xo
I hope to try this some day. I love the way you bent the spoon handle down so it shows at the bottom of the key chain!
Awesome!! Maybe this will be the kick in the pants I need to get my kit out and do something with it.
Janet
Oh, I admire your ability! Do you sell them?
Nancy
http://wildoakdesigns.blogspot.com
Oh, I love this! Thanks for the tutorial!
OMG! “Bend the spoon with your mind”… I will have you know I SNORT laughed at that. So thanks.
Super cute project Kelly – Really like this one extra lots :)))
Love the tutorial! I’ve been wanting to do this forever. I have the spoons, just need the letters.
I love it! I have tried but never finished one. …sigh..maybe I will soon.
That’s so cute Kelly! I want to do this now!
Love, love, love!
This is really cute! They would make great gifts, if I only had the supplies. But, I do love it!
Absolutely LOVE this Kelly! Perhaps I can have my son channel his inner Yoda and bend it for me! LOL! Great project! Pinning!
Oh thank you! I have been curious about how this was done. It much simpler than I thought.
What size stamps do you use? Thanks!
One of these days, I am going to do this 🙂
Debbie
I am watching some stamp sets on ebay and was wondering what size that was? I see that there are 4mm and 3mm (so far). I like the look of the lower case lettering, so I think that I am going to go with that, but I was just wondering mainly about the size.
Can you use silver plate spoons? If now where can you find cheap silver spoons?
Yes silver plate works perfectly!
Great!
S.T.U.P.I.D. question….where am I going to find silver spoons? I don’t think there are any flea markets in my area. All we have are “trinket” stores and they JACK their prices sky high…I probably couldn’t afford a spoon! Suggestions?
shop your local thrift stores….they usually have a tub full of loose flatware….I Goodwill shop every week …and you can get 20% off coupons on line
also Salvation Army…good place to shop
Sometimes, people live in small towns where there are no Goodwills or Salvation Armys nearby however, there are always garage sales, estate sales and auctions. I have lived in both a small town and a big city and find to have the most success at estate sales. Sometimes, things are half price on the last day too, but don’t leave it there if you fall in love with it. Go for it!
I wondered how that was done !!!…now I know…I have a feeling some family members will be getting home made keychains for Christmas this year ….thank you for all the fun info !!!!!
what size letter stamps did you use for this project ?….thank you
Any tips on stamping plated silver spoons?
What type of hammer do you use to flatten the spoon?
Hi, I just found this tutorial. Very helpful. My question is, how can I tell the difference between silver and stainless? I think I already bought $20 worth of stainless spoons at goodwill. BOO!
When buying the alphabet set, is there a certain size you would suggest? Also the block size? I will look at our local hobby lobby and wasn’t sure if there are multiple sizes or not.
Hi Carol – the link to the set I use and the block is in the post – hope that helps!
I have tried this before, without the metal block underneath. That must be the trick! But I also know that it’s not easy to line up the little letters as well as you do, so I know you been doing this for a while! Nice work and easy to follow tutorial!
Kelly, your are the Bomb! I love your site and I can’t help but share your DIY’s! Love your stuff. I just ordered the supplies for these spoon key chain ad I will be making my trip to the thrift store for spoons! Thanks for sharing. ~That Chic~
Kelly,
I know this is an older post, but I hope you get this comment. I was wondering if you prefer using all capital letters when stamping, like shown, or if a combo of capital and lower case are sometime preferred. I have some vintage knives and spoons I’m going to use for the garden and need to order some stamps. I figured you’d be the expert to ask and thought the capital letters would most likely show the best on them. If you get this, could you let me know. I love these and this idea! Thanks and have a great weekend
Love this idea,I have been thinking of different ideas to use vintage silverware for , as I have my mother in laws silverware after she passed and these would be so cute to make each sister in law and niece form the pieces with different sayings on each! thanks for the tutorial.
Hello there, I know this is an older post but hopefully you’ll read my question, I’d really appreciate some feedback. I decided to make my beat friend stamped silver played spoons as souvenirs for her upcoming wedding, I have bought the stamps, tools and spoons but I have questions as to how to finish the project. I know I have to use a chemical to tarnish the stamped letters but I wonder can griffith silver black be used on stamped silver spoons? PLEASE PLEASE HELP ME 🙁 the wedding is nearing and I don’t want to poison anyone when they use the spoons with chemicals on them =O . THANK YOU!!!
I have never used giffith silver black Katherine so I can’t say. You can always stamp your silver and not use anything to darken the lettering. Good luck!
Can silver plate spoons be used on only sterling silver?
Hello! Thank you so much for posting this! These seem relatively easy to make, and i’m excited to give them a try. I wonder, however, how you would go about getting the spoon back to its round shape after it’s pounded out? is that something you can do?
thanks!
I actually took some to my local car repair shop and they put them in some sort of vise to flatten them – they were much smoother that way – but still not perfect. The imperfections are part of the charm!
Thank you for this! I have some of my moms old silver spoons and have been wanting to make something from them. Now I know what! I think, rather than a keychain, I will make pendants and use [probably] leather to hang it from (due to the weight of the pendant). Or maybe a [heavy] silver chain. I will make one for my daughter and one for each of my granddaughters and tell them it’s from grandma / great grandmas spoons. Each with a different saying. Thank you again!
I cannot find sterling silver spoons unless the price is way too high..Any ideas where to look?
Hi Lois – I find mine at flea markets and estate sales. The mismatched ones (not sets) are cheaper. Good luck!
Hello, I see someone asked what size is best a long time ago and was not answered!
I am looking on-line to order the punches and I have never done this before. The sizes are 1/8, 1/4, and 3/8. One also says 6mm. Please let me know what size is best to do punching on old forks & spoons!
Thank you,
carol 🙂
Carol – there is a link to the stamps in the post – I don’t know off the top of my head
Thank you for the tutorial! Two quick questions though- 1) I’m having a hard time finding silver spoons, and you’re right- stainless steel is too hard. Any luck with silver plated spoons? Where’s the best/most affordable place to find silver spoons (and how much is appropriate to pay for them)? And 2) How do you keep the stamp from sliding around on the spoon? Sometimes mine slip and I end up with one of the letters getting stamped in every-so-slightly different places. Thanks again!
Hi Dawn – try thrift shops, flea markets and estate sales for silver plate. If they aren’t a matching set and have tarnish, I wouldn’t pay more than $1 per piece. The towel under the spoon helps it from shifting – keep a firm grip – practice, practice, practice! Hope that helps!
Dollar General for spoons. .50 a piece
You need silver plate to stamp – the spoons from dollar store are steel and too hard to stamp on
What size stamps? They come in different sizes at Harbor Freight and I don’t know which to get.
I find silver and silverplated flatware at Goodwill for 25 cents a piece.
Also try Salvation Army, etc.
You cannot use stainless steel.
I’ve seen these spoons but never the how-to instructions. Great post!
Beautiful job, but where do you get the supplies from to get started? Sorry if you have already answer this.
What a cute idea, especially with Christmas coming!
Just bought a stack old of silverware from a guy for $12…now I’m figuring out what to do with it. Thanks for making it look easy!
It was fate!
Hi! About how long would you say it takes to make one of these? Something like the one above? I want to make a bunch but I need to make sure it’s not extremely time consuming before committing to purchasing all the supplies.
Thanks,
Amber
Hi Amber – it takes practice (I’ve messed up some spoons before I got the hang of it). It takes time but I haven’t done it in awhile. Once you get the hang of it, it goes more quickly. I would not say it is a quick project for beginners.
Ive tried stamping silverware. I cant get it to make much of an impression on the piece. If I hit more than once, the stamp has moved and it gets a shadowed double impression. How do you get your stamp to stay in the exact sale place to avoid this???
It takes practice Sharon and a steady hand. Keep trying on one piece of silver until you perfect it.
Could you be more specific on what is a “scrubbie sponge”? Thanks
The green rough side of some sponges
Does the sharpie wear off? Also is it food safe?
Sharpies are not food safe and I assume it can wear off eventually but mine haven’t.
Just having a big sort out of my Mom’s old silver cutlery. Delighted to see what can be creatively made with something I love but would like in a different form. Thank you
My pleasure Virginia! Stamping silver is so much fun!