Craft Supply Organization Tips and Make Chalkboard Labels for Pennies!
Get creative craft supply organization tips and storage ideas plus see how to make chalkboard labels for pennies! Get organized on a budget!
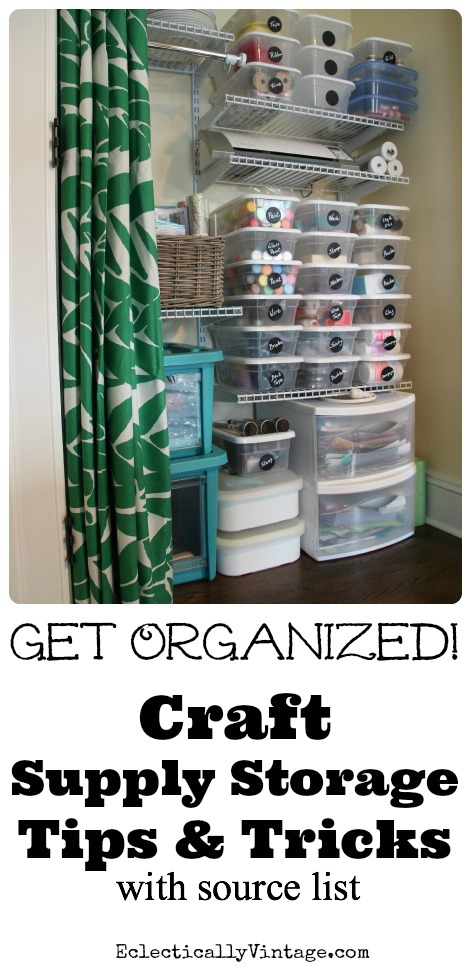
They threatened to bury me alive … my craft supplies.
Who knew glitter and glue could be so dangerous?
So I took over the seldom used guest room as my office/craft room/mom cave/escape!
Forget coats, sweaters and scarves.
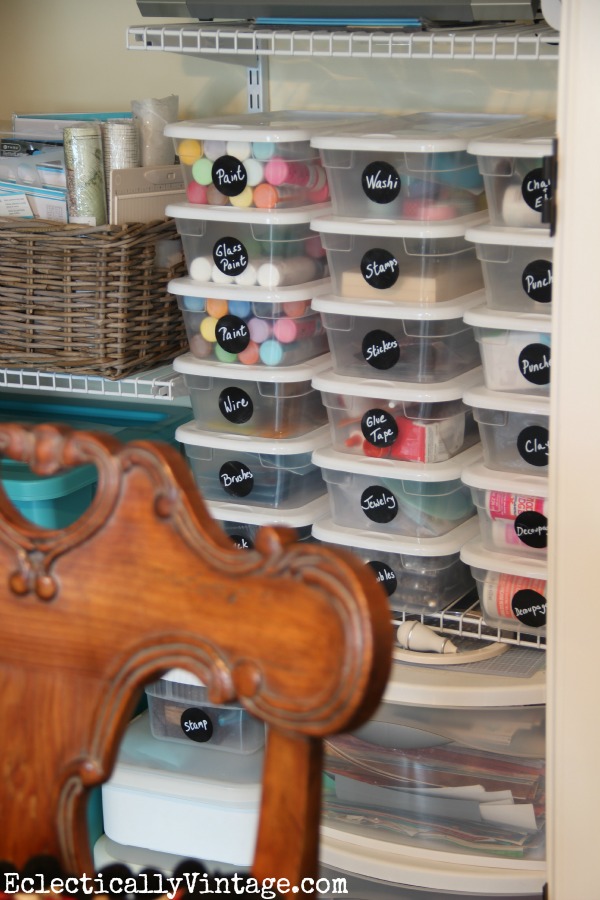
This closet now holds every imaginable craft supply known to woman.
You know I’m all about decluttering – make sure to read my Decluttering Tips.
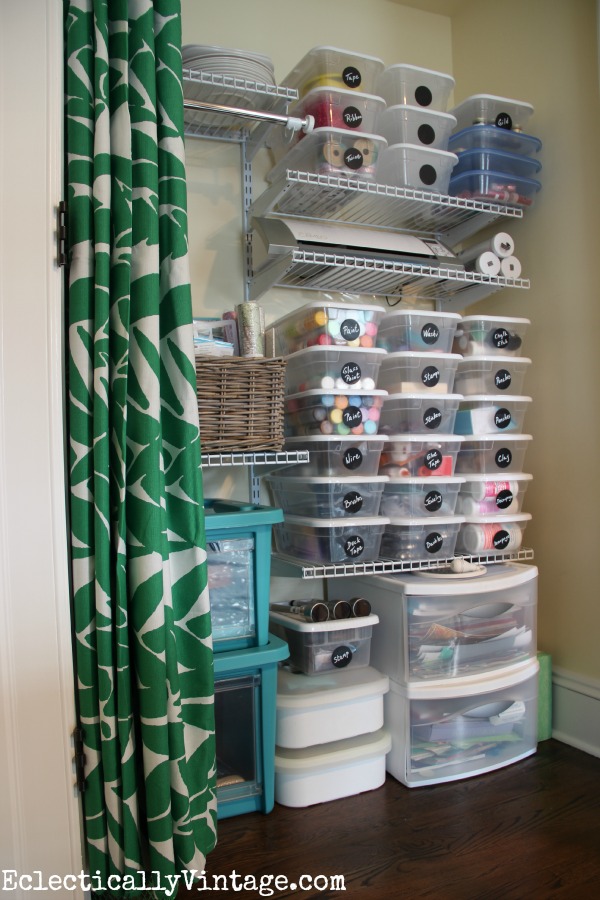
Craft Supply Organization Tips
Less Time Digging and More Time Doing!
1) One Space
Whether you have a room dedicated to crafting or have carved out a niche in an armoire, desk or drawer, keep everything together in one spot and one spot only.
I turned a clothes closet into a craft closet and love this closet hanging system that is so affordable with shelves that can be arranged to your liking.
2) Store Where You Work
Store your supplies where you like to craft, whether it’s near the tv or in your kids playroom so you can hangout with them while creating.
You don’t want to keep running into another room when you need something.
3) Choose Containers
Clear containers are ideal for most things – the dollar store has a great selection. Measure your space and start shopping.
Baskets which are perfect for filing things vertically (instead of flat) so you can flip through them easily. This is where I store stencils.
Flat paper storage containers or scrapbook file boxes are perfect for storing stacks of paper.
I love these storage containers with pull down front panels for easy access.
4) Container Size
Smaller is better so things don’t get buried at the bottom of a giant container.
5) Label
I prefer chalkboard labels since they can be updated as your supplies change.
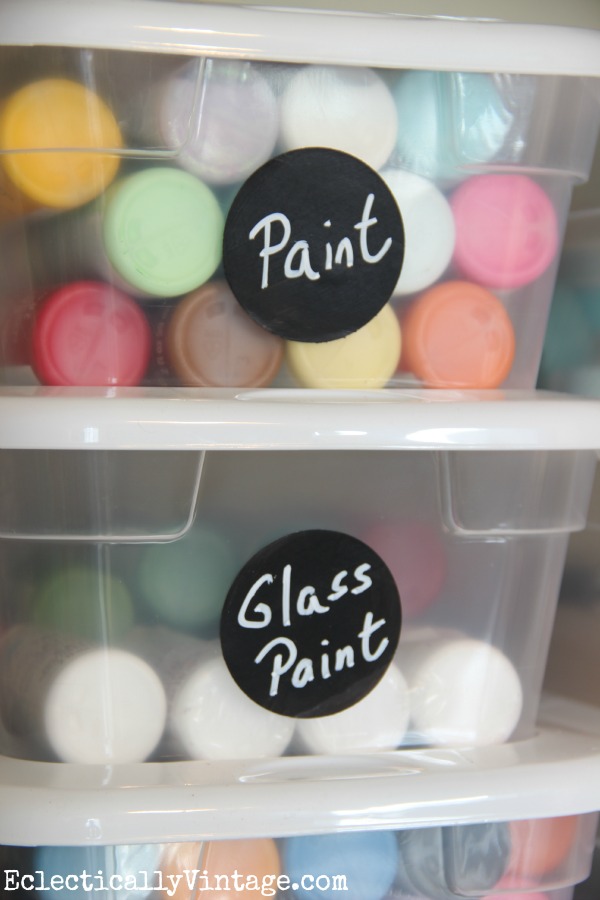
I made my own chalkboard labels for pennies (see how below) and love using a chalk marker which is much neater than chalk.
6) Separate Frequently Used Supplies
For those items you use everyday, keep them in a separate container or within easy reach.
I have a tray with vintage milk glass on my desk which I filled with scissors, markers, glue and other things I use a lot.
7) Replace
Being organized means not buying things you already have (but forgot about).
Keep a running list of what you run out of and make sure to replace those items.
8) Put it Back
Get in the habit of putting everything back where it came from when you complete a project.
9) On the Go
Do you move from room to room or take your supplies on the road?
A rolling storage case will have you organized on the go.
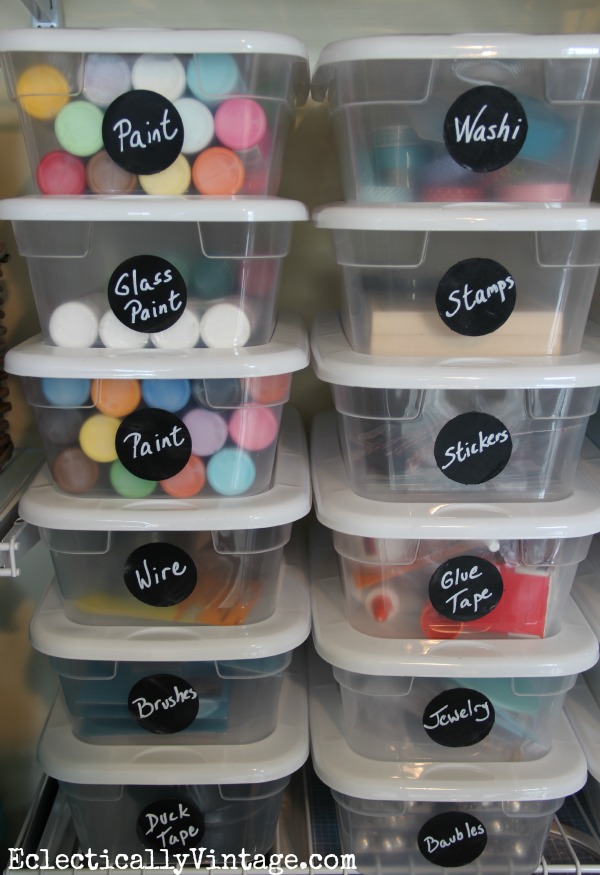
What lurks inside those mysterious boxes?
Labels were needed but since I’m cheap …
I mean, since chalkboard tags are mucho expensivo – I decided to make my own for pennies.
Make Chalkboard Labels for Pennies
Supplies:
Round Label Stickers
Chalkboard Paint
Paintbrush
Chalk Marker
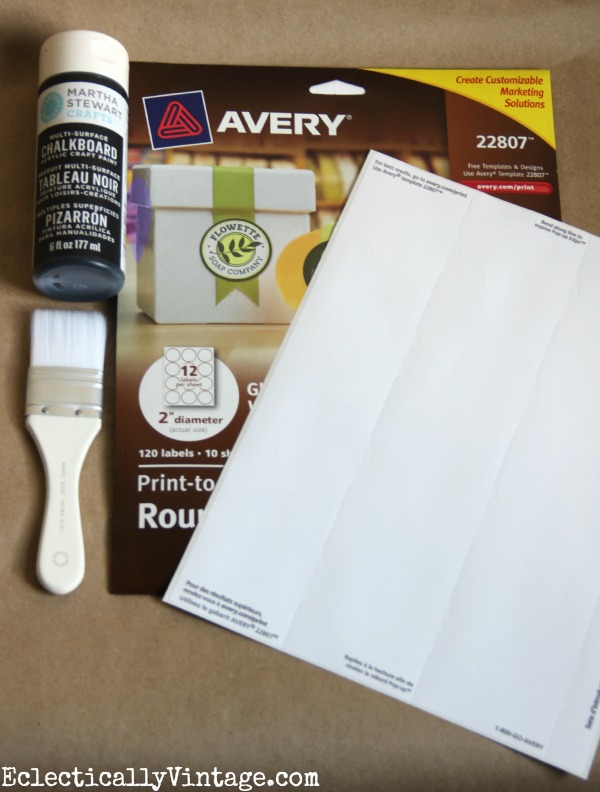
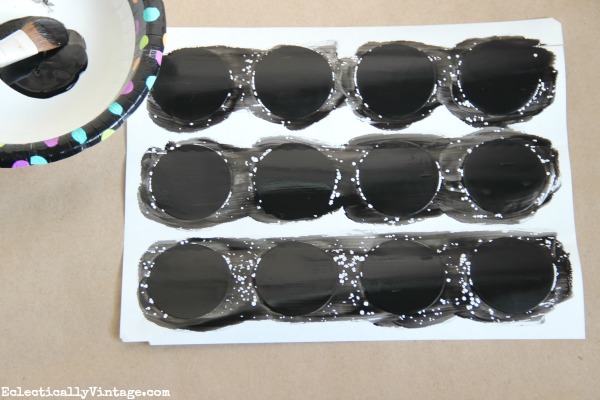
1) Paint two coats of chalkboard paint onto round label stickers – letting dry between coats
2) Peel and stick onto bins and boxes
3) Use a chalk marker – so much easier to write neatly than chalk – to label your supplies
4) Sigh with relief that you can now find your glitter, glue and paint at a glance
And now my craft supplies are happy and have stopped their evil plans to murder me in my sleep.
Get on the organizing bandwagon.
Don’t miss my Decluttering Tips

Ah, there’s the solution to my problem…”Put it Back”! 🙂 So organized, love the tip for painting the labels with chalkboard paint, brilliant!
love that idea of making your own chalkboard labels. never would have thought about that.
Kelly, I feel like my craft supplies can eat me alive too! Love your tips! The chalkboard labels are perfect…so clever how you just painted your own.
Love those chalkboard labels! And now when I come visit, since the guest room is the craft room, I can craft away all night long!
All this organization is making me want to get my craft room organized. Your space is just perfect will lots of helpful tips.
Great craft organizing. I love those labels.
Wow Laura!…Love that super organized craft space and great idea on making those great chalkboard labels!!!
Thanks for all of the great tips!! Great partying with you…hope you had a great Home Show too!
I totally agree with your steps to follow. My favorites are “one space” and “put it back”. Now if I could only do that!
Wow – I have organization envy! Looks great and easy to find everything. And great idea for making chalkboard labels. I wonder if my craft supplies are plotting against me, too….hmmmm….:)
The garage organization is not working it is all black pictures and keeps cutting my machine off. Can you let her know? Would love to see that one too. Some great ideas shared here. Thanks
It took a little bit to load for me – the pics were black – but then it came up no problem. Give it another try and see if it works Carol.
i need to reorganize my once organized craft closet! thanks for the inspiration!
Wow! My craft closet could take a few lessons from your! LOVE! Life to the full! Melissa
I’m impressed. I might need to get some bins.
Maybe Martha hasnt heard, but you can buy chalk board vinyl, and cut your own desired sizes into stickers! Yoh have a wonderful craft room!
Maybe Martha hasnt heard, but you can buy chalk board vinyl, and cut your own desired sizes into stickers! Yoh have a wonderful craft room! (Didnt mean for that to sound snarky!!)
Fabulous! Love the curtains you used too kelly and great idea with those labels!!!! I still have chalkboard spray paint here, so this project will come in handy! I like how you organized this nook!
On the cheap chalkboard label subject, I discovered something recently that I thought I’d share. I was wanting to make some Angry Bird’s silhouettes for my son’s bedroom wall (in lieu of the ugly primary colored things you can buy), and instead of painting black on the wall, I wanted something removable. I found a roll of black contact paper at the grocery store, with the regular contact paper. $7 dollars for 24 feet! I cut out the shapes I wanted, then drew eyes on with chalk pen. As I was making them, it hit me that I could make THOUSANDS of labels out of that one roll. Any size or shape that I want. I’m gonna be a labelin’ crazy person. 🙂 Here’s the link to the room post I did, if ya wanna see what they look like: http://rindymae.blogspot.com/2014/01/24-hour-bedroom-makeover-kids-new-room.html
This is so great. My stuff is a mess and I need to do something like this!
Oh, Kelly. That looks SO great. I just said that I am organized but I need to work on PRETTY organization! Love this idea. xo Diana
Way to make me feel unorganized! I’m super envious of your mad organizing skills! Thanks for the inspiration!
oh you made me laugh…mucho expensivo?? LOL…..pinned for sure, I was just thinking about making some DYI labels for our IKEA TROFAST storage in the playroom.I think these would look great ! Christine from Little Brags
http://littlebrags.blogspot.com/2014/01/our-play-room.html
Good for you making your own! I bought some at Hobby Lobby, that weren’t bad, and I have used them over and over, love them!! Your craft space is awesome, and you’re right, it needs to be where you are doing it!
This is such a good idea! 🙂
Becky
Vintage Clothing UK
I wish my craft supplies were as organized like yours – that looks great Kelly! Thanks for the tips and the cute labels idea!
My craft supplies are mixed in with my sewing stuff…I definitely need to get them sorted out! I love your tags too. Thanks for the how-to on those!
I love the look of tidiness in your closet! I have some pretty good storage, but I really like yours, I love the chalkboard labels…so easy & inexpensive! Thanks for the inspiration, Kelly.
Debbie 🙂
I love the labels! Pinning!
Great tips, love the chalkboard tags!
Debbie
Ok, {again} you’re hired. Love this and great inspiration for me right now!
love how you used your closet for organizing your supplies.
Hope to do that in my craft room closet if et everything moved out of there. Right now it is storing all 100 plus nativity sets which this summer they will all be moved out into our Christmas shed once it gets built. :}
This space is so inspiring!
What’s up mates, how is the whole thing, and what you would like to say
concerning this article, in my view its in fact amazing designed for me.
Hello, I was wondering where you got the fabric for your curtain? I like it and it just might be what I was looking for.
The curtain is actually a shower curtain from HomeGoods!
Great inspiration & timing for me to find this! What is the shelling brand you used? Rubbermaid? IKEA? THAT is what I need to start with! Then I will recreate your masterpiece and take ALL the credit!! 😉
It’s a Rubbermaid closet organizer!
I LOVE your space, Kelly! I searched Pinterest for a way to better organize my craftssupplies and I am SO motivated by your ideas! I also made my own chalkboard labels and wanted to share. I used rainbow paper that I got at my local teacher store (Lakeshore Learning). The paper is designed to be “scratched” on with a stick to make rainbow colors, but can also have the appearance of a chalkboard when one uses chalk or a chalk pen on it. Here is a link to the blog where I mentioned it. Thanks for sharing!!!
http://ourlittletinies.blogspot.com/2015/03/pantry-reorganization-again-and-how-i.html