How to Stencil a Wall Like a Pro
I have an embarrassing confession.
I’m afraid of something that probably wouldn’t scare most normal people.
You see, I have a fear of stencils!

Strange but true.
Not the small stencils made for crafting – but those great big stencils for walls.
I’ve had a few sitting in a box for over a year, collecting dust, just waiting to be used to make an amazing focal point.
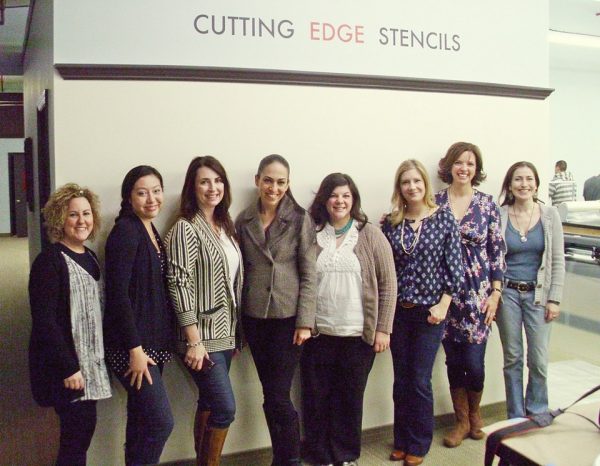
Luckily, our Bloggers Day Out was at Cutting Edge Stencils where I learned a few tips and tricks on how to stencil a wall like a pro from Janna & Greg, the owners (who have 20+ years of faux finishing experience under their belts), to help me overcome my fear.

Stencil a Wall Like a Pro – Insider Tips From Cutting Edge Stencils
1) Use flat or eggshell basecoat on walls ( not gloss/semigloss if possible)
2) Tape your stencil to the wall with a few pieces of painters tape (no need to use self adhesive spray)
3) Start at upper left corner (or the middle if symmetrical corners are desired)
4) Make sure the stencil is level
5) Load a small dense foam roller (not a regular paint roller) with flat or eggshell latex paint (Ben by BM is a great choice) and make sure paint is absorbed evenly on roller
6) Offload excess paint onto paper towel
7) Roll over stencil with medium pressure
8) Check for coverage and remove stencil when finished
9) For next stencil, align using the elements of the previous stencil you just completed (by overlapping stencil onto a part of the previous design)
10) Repeat the process
11) For top of wall, you can use a special top edge stencil if desired
12) Finish edges after the main wall is done
13) For corners, tape the next wall with blue painters tape, bend stencil so it fits into corner, then roll straight into the crease and finish with a stencil brush
Watch this short video from Cutting Edge Stencils to see how a pro stencils!
Janna & Greg, the owners of Cutting Edge Stencils, have over 20 years of professional faux finishing experience under their belts so they really know their stencils!
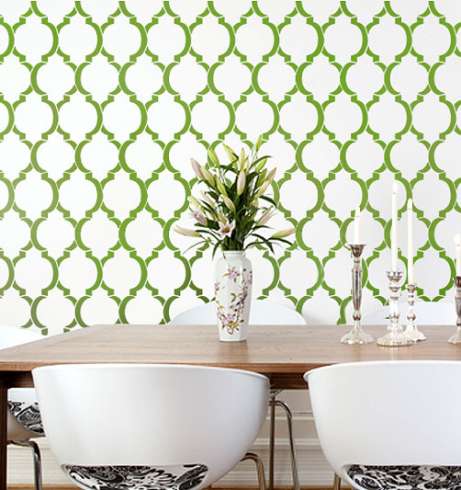
Here’s our practice wall – isn’t it gorgeous!


I’m happy to say that I’ve conquered my fear of stencils (but I’m still scared of mimes).
No non-moving object is safe from me or my stencils now.
Who am I kidding, I may even stencil my kids and our goldfish!
Thanks Janna & Greg of Cutting Edge Stencils for hosting our outing, providing us with fabulous food and stencil swag! All opinions are my own.

This was very helpful! I too am rather afraid of wall stencils. They just look so darn complicated, especially the corners. Humm, I will have to give it a shot and see what happens!
You’re not alone; as I’m a bit intimidated by the large wall stencils myself.
Have been wanting to do something with my entry way but have put it off for over 10 years now but with the tips that you have listed I just may give it a try.
Thank you
ColleenB.
I’ve never done it, and I’ve been afraid to try…it seems so daunting. I’ve watched Cutting Edge Stencil’s videos but still I”m still afraid to try. I should tell myself, it’s only paint, easy to repaint if I mess it up!
What a fun day that must have been! And I love your entry!
Debbie 🙂
What a fun day — love seeing stencils make a comeback!
xo Heidi
WOW that is just awesome Kelly! I love cutting edge stencils. They truly are top notch quality, and the end results are amazing!
I have yet to try a stencil on a wall … but your practice wall is gorgeous! You know I already clicked your link. Good luck my friend!
How fun and I’m just slightly jealous…lol I’m glad you all had such an amazing time and Cutting Edge Stencils is such a great company!
Heather
I’m in the same boat Kelly, really, really will use mine this year, thank you for the wonderful tips and excited about your upcoming projects! Happy Sunday!
Have never stenciled my walls, which is too bad because I’d love to have such a pretty pattern on it. The selection of wall stencils in Germany really is a shame. Can we get them to expand to Germany?
I’ve done quite a bit of stencilling and I do it just like your tutorial. The two best tips are to make sure and use a level to check that your stencil is level and to use a tiny foam roller (as it works like a charm). I look forward to seeing your soon to be completed stencil projects.
I’ve never stenciled a wall because, like you, I was afraid of it too. I’ll keep your instructions in mind, however, should I be overcome with the desire to take on such a project again. Thanks for walking us through it. When will you be doing the post on overcoming the fear of mimes. I’d love to see the step by step on that!
Hi,
Great post and thanks for the tips and tricks!
I have a question. On point 9, you say, and I quote, “previous stencil align using the elements of the previous stencil you just completed (by overlapping stencil onto a part of the previous design.” You would smudge the paint doing this. So does that mean that we have to let each square dry before we go on to the next? That would take forever. It was my understanding Cutting Edge and other high quality stencils have marks on all the sides. These marks are to be noted on the wall (with a pencil, maybe) so the next stencil can be lined up and won’t smudge the last stencil. For instance, if you’re moving from upper left to upper right, on the first stencil you would pencil the mark on the right side of the stencil. When moving on to the next stencil, you would line up the pencil mark with the mark on the left side of the stencil. I think I’m missing something important here.
Help me get over my fear!!!!
All the best,
Cathy
Cathy – you can line up the stencil by doing an overlap over the stencil you just painted. The paint dries very quickly (we only loaded our brush once for each stencil – so you don’t need a lot of paint) – I couldn’t believe it either! We did about 10 squares – and each time, we immediately placed the plastic stencil over the previously painted one – no problem! Janna – the owner of Cutting Edge stencils said to do it this way – and a big mistake people make is by trying to line up the stencil by using the edge of the plastic stencil (instead of overlapping). Hope that explains it!
Kelly
Thanks, Kelly
I’m actually shocked that we would overlay the next stencil over the previous one. You got it right from the horse’s mouth so to speak. And after all these years she would certainly know what she’s talking about.
My fear is still there just not as bad.
Cathy
Kelly,
That looked like a great outing you guys had! I used the Casablanca stencil on a wall in my sister-in-law’s house and it turned out great. My tip for folks is that…hey, it’s only paint! If you mess up, just paint over it and begin anew!.
Thanks Kelly, I have been thinking about trying this and I feel much more confident now after reading your tips! I went to the stars party and saw your planted dresser, TOO CUTE! What a fun and crazy idea, loved it! I hope to spend more time there later, so many fab ideas at that party!! Thanks for the tips!
Those large stencils scare me too! Let me know when you finally do a wall at home – I want to read the tips and see if it’s as bad as you thought. (I don’t like mimes either!) Thanks for your sweet comment and for Pinning the bathroom. Glad you liked it!
Allison
Atticmag
Hi, I totally agree with you. I bought some stencils about a year ago and my fear has prevented me from using them. I plan on redoing the wall in my bathroom so hopefully these tips help me out.
Great tips! And it looks like an awesome day! I too have a fear of stencils, but I’m hoping to overcome it soon in our dining room!
Great post – with great tips!!!
I could have used this last year when I attempted it and stopped halfway through LOL
Hugs,
Suzan
Voted for ya! Bring on the karma! 🙂 And you guys are all SO cute up there in your stencil class! Love those tips. I cannot wait for your 6 days of Spring series. Woot!
Wall stencils make me nervous, too, but I have so many walls crying out for some pizzazz! Thank you for sharing those tips. I’m going to start looking for big stencils now. Oh, and I clicked your link. 😀
If you haven’t already, I’d love if you’d come join my How To Tuesday link party, too.
http://housewifehowtos.com/link-party-2/how-to-tuesday-link-party-10/
Thanks for the tips! I work for Benj. Moore and I have tried paint from everywhere over the years and the Ben eggshell has excellent coverage and levels so nicely. Priced right too. Just about to try the Ben flat on a stencil I ordered from Cutting Edge Stencils last year! Finally getting around to doing it.
I love the stencil…glad to find new sources!
I really want to know how to handle a situation where I’ve got overlapping stencils in different colors. I’m trying to bring all the colors to the fore, in differing places (it’s a flock of cranes stencil). Some will be in metallic, some in flat, some in semigloss.