How to Make a Plate Wreath – the Damage Free Way!
When I stumbled across this gorgeous DIY plate wreath, I fell in love and knew I had to share it with you! I’ve seen plate wreaths before but they all use heavy duty glue which will ruin your beautiful plates! This method of wreath making will not harm your precious plates! I love the idea of using mismatched vintage china from the thrift store or plates handed down from family members to create a unique wreath for any season or holiday.
I asked the creator of this stunning wreath, Suzanne Zingg, if I could share the how to with you and she graciously said yes!

Suzanne says, “This is a great project for displaying random mismatched small plates, butter pats and shallow bowls without damaging them. You can hang these on doors, cabinets, walls or on bookcases – anywhere that doesn’t get a lot of movement. (I wouldn’t hang them on a high traffic front door or a cabinet door that gets lots of use).”
Hi, it’s Kelly here chiming in with my two cents … I would probably take the easy route and use a pre-made wreath to attach the wire wreath form to or you could use a grapevine wreath and secure the plates directly to that. If you decide to use a pre-made wreath, you can omit steps 1 and 2.
This post contains affiliate links which means if you make a purchase, I may earn a small commission at no extra cost to you.
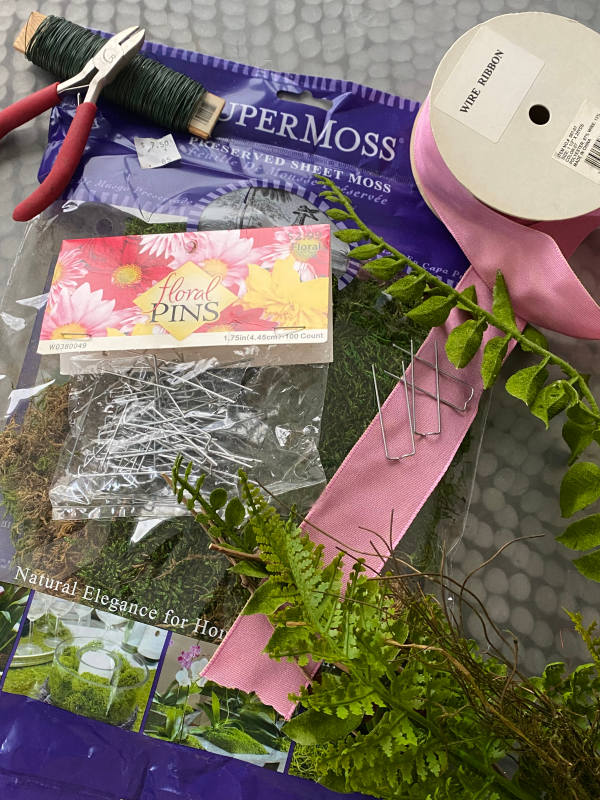
Wreath Making Supplies
- Assortment of coordinating small plates, cups, saucers
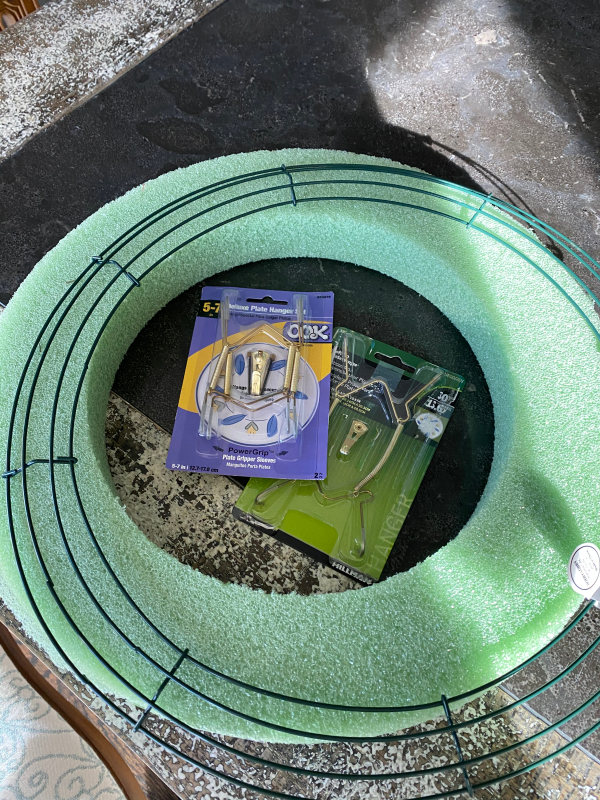
- 14″ wire wreath form
- 14″ foam wreath form (extruded or styrofoam – both work well but should be close in size to wire form)
- Small wire plate holders
- Small velcro Command strips for attaching butter pats and tiny cups
- 30 gauge wire and wire cutters
- Decorative wire ribbon for bow
- Sheet moss
- Floral pins or hot glue gun
- Faux or real greenery
- Optional glue dots if attaching small, decorative items
How to Make a Plate Wreath
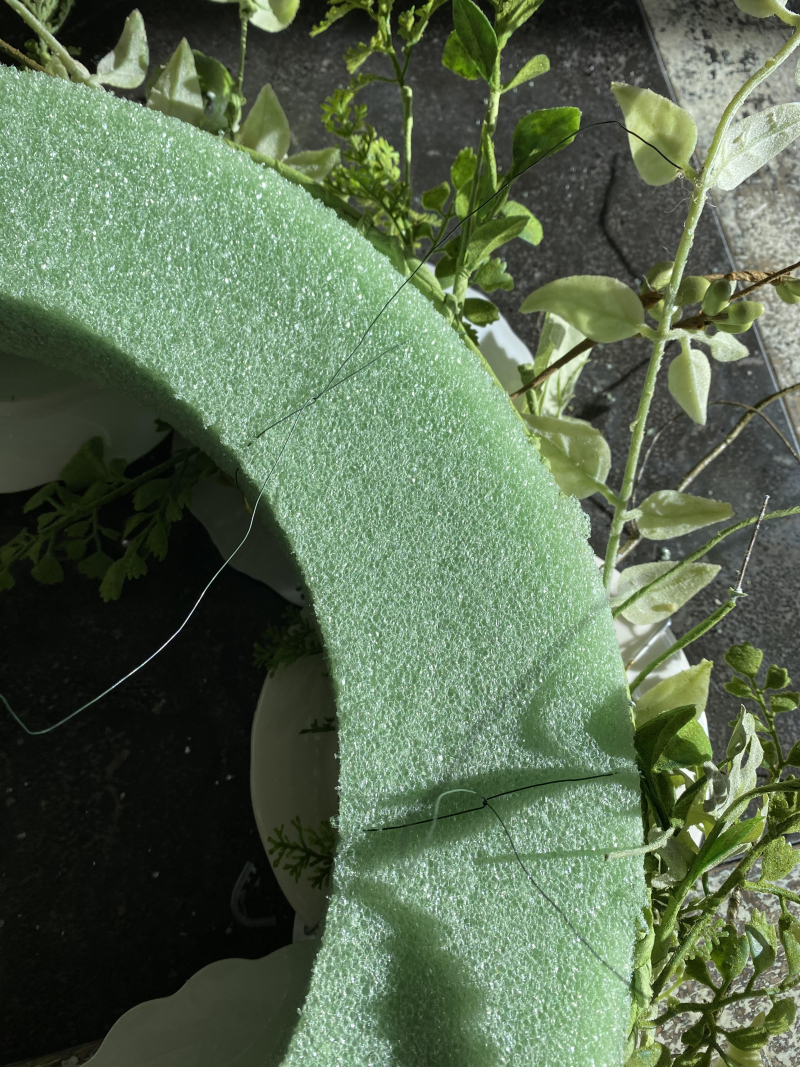
1. Cover foam wreath with sheet moss using the floral pins to secure. You can hot glue the moss in place but be careful as it is easy to burn yourself when working with moss. Concentrate on covering just the outside and inside edges of the ring, the back and top will not show once completed and hung.
Note from Kelly: you can use a pre-made decorative wreath instead of the styrofoam wreath form.
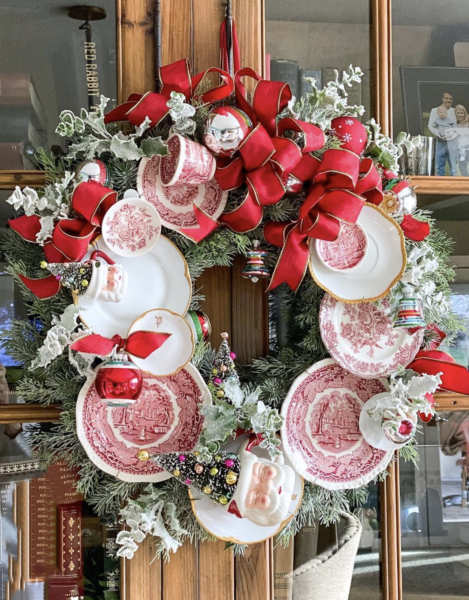
2. Attach faux or fresh greenery to outside of the moss covered wreath using floral pins or by sticking the stem into the foam. You can also use picks, garland or whatever greenery you like. The greenery on the red and blue wreath was fresh.

Lay moss covered wreath aside.
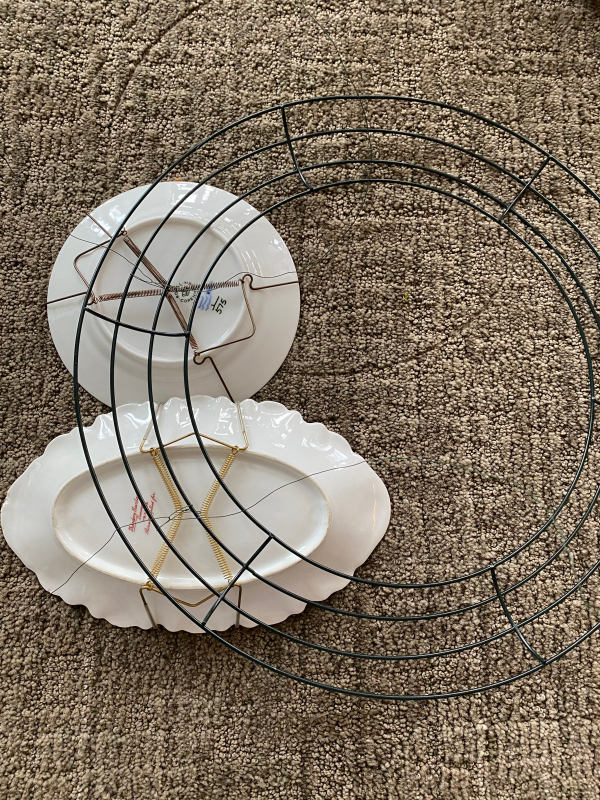
3. Arrange plates on the wire wreath to get a feel for placement and number needed.

4. Attach wire plate hanger to each plate and or bowl. Attach a 30″ piece of floral wire, to the wire plate hanger as shown below and then wire the plate to the wire wreath.
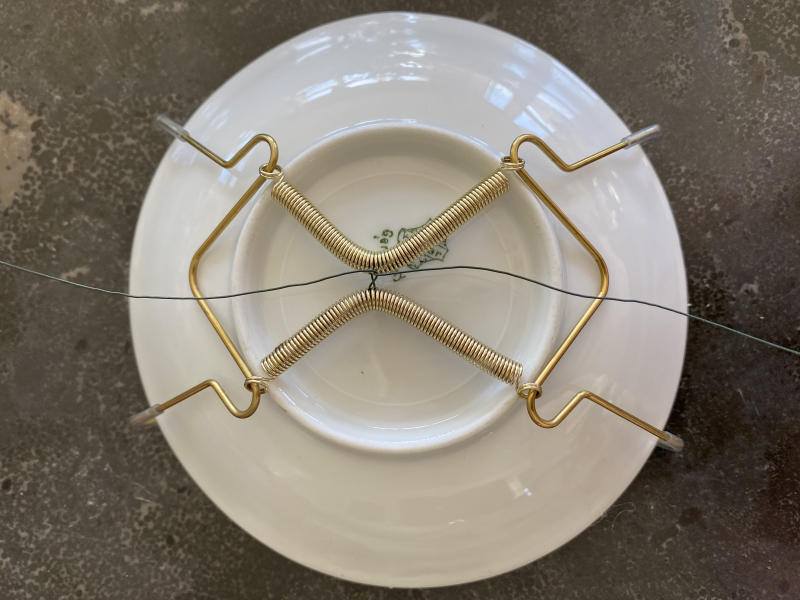
5. Working one at a time from the back side of the plate (upside down) continue adding plates to the wire wreath (see photo below). Notice I used a long (30″) piece of wire to attach each plate. You will use these long wire ends to attach the plate wreath to the foam wreath later so leave the long wire ends attached. When arranging your plates you will want to overlap them slightly. Consider patterns and colors in your arrangement.
6. Once all the large plates are in place wire the plate wreath on top of the moss covered foam wreath using the long wire ends, twisting to secure. Trim excess wire once secured.
7. Turn wreath over and fluff greenery, adding more where need.
8. Wrap ribbon around both wreaths for hanger and glue or tie a knot to secure two cut ends together.
9. Make and attach optional bow.
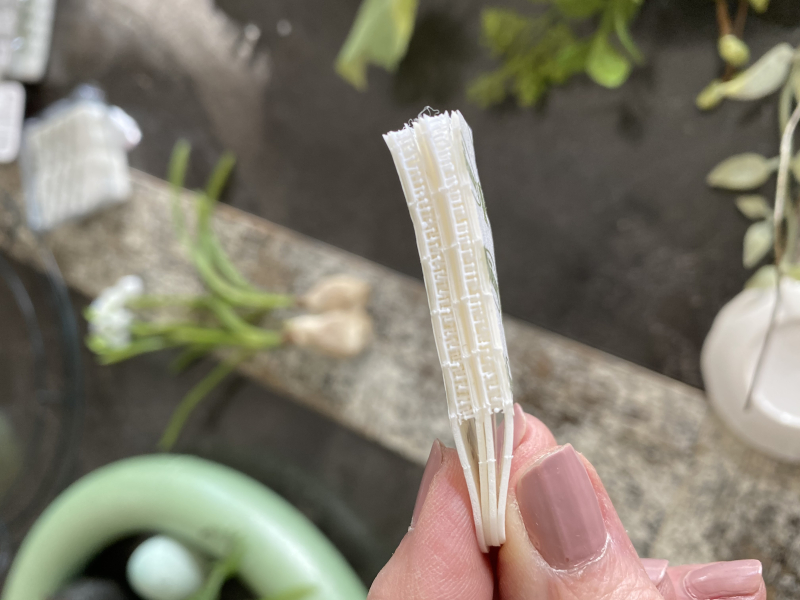
10. To attach the butter pats, I used four layers of Velcro Command Strips (see below). The backs of the pats are not flat so I needed to build up the strips so the pats could sit flat on the plates. Position the butter pats between bigger plates. I like to cover up the wire holders whenever I can so I often place a butter pat over the top of the hook of the wire hangers.
11. The silver sugar tongs, tea spoons and fork in the red and blue wreath were attached with glue dots.
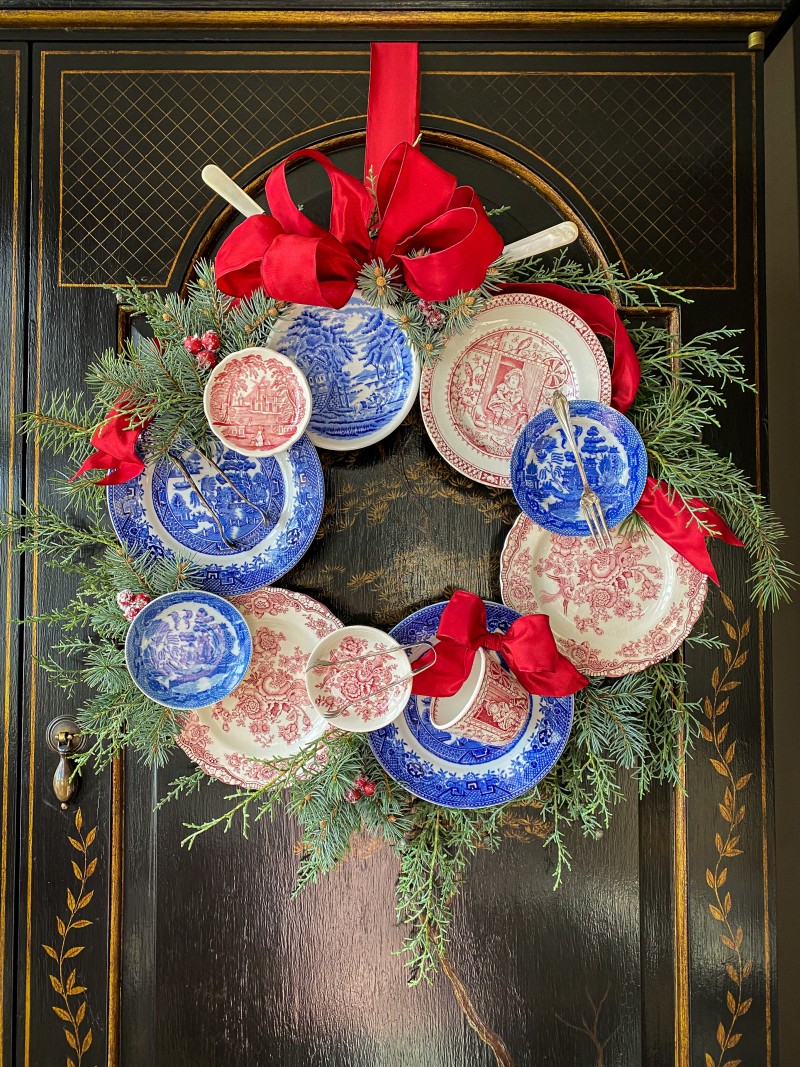
Thanks Suzanne for letting me share this fun plate wreath! The possibilities are endless and I’m thinking how fun it would it be to create a Christmas plate wreath!
Don’t miss Suzanne’s stunning Ornament Wreaths here or visit Suzanne at her blog, My Retired Life on the Prairie.
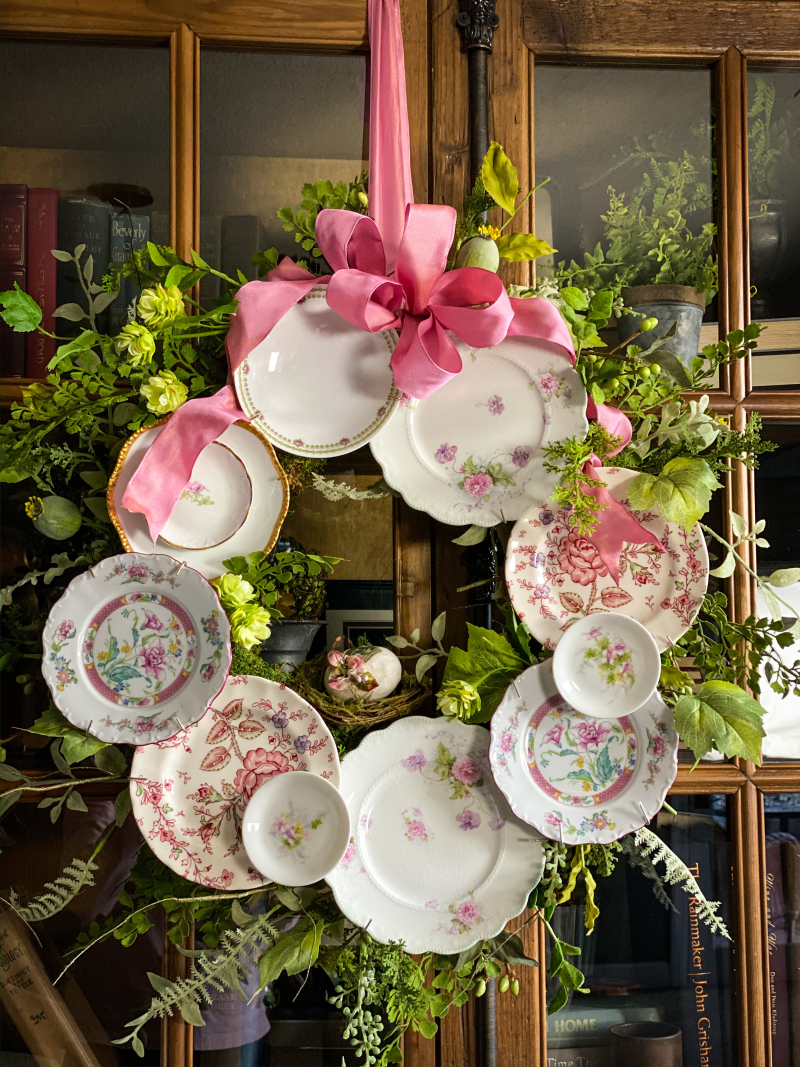
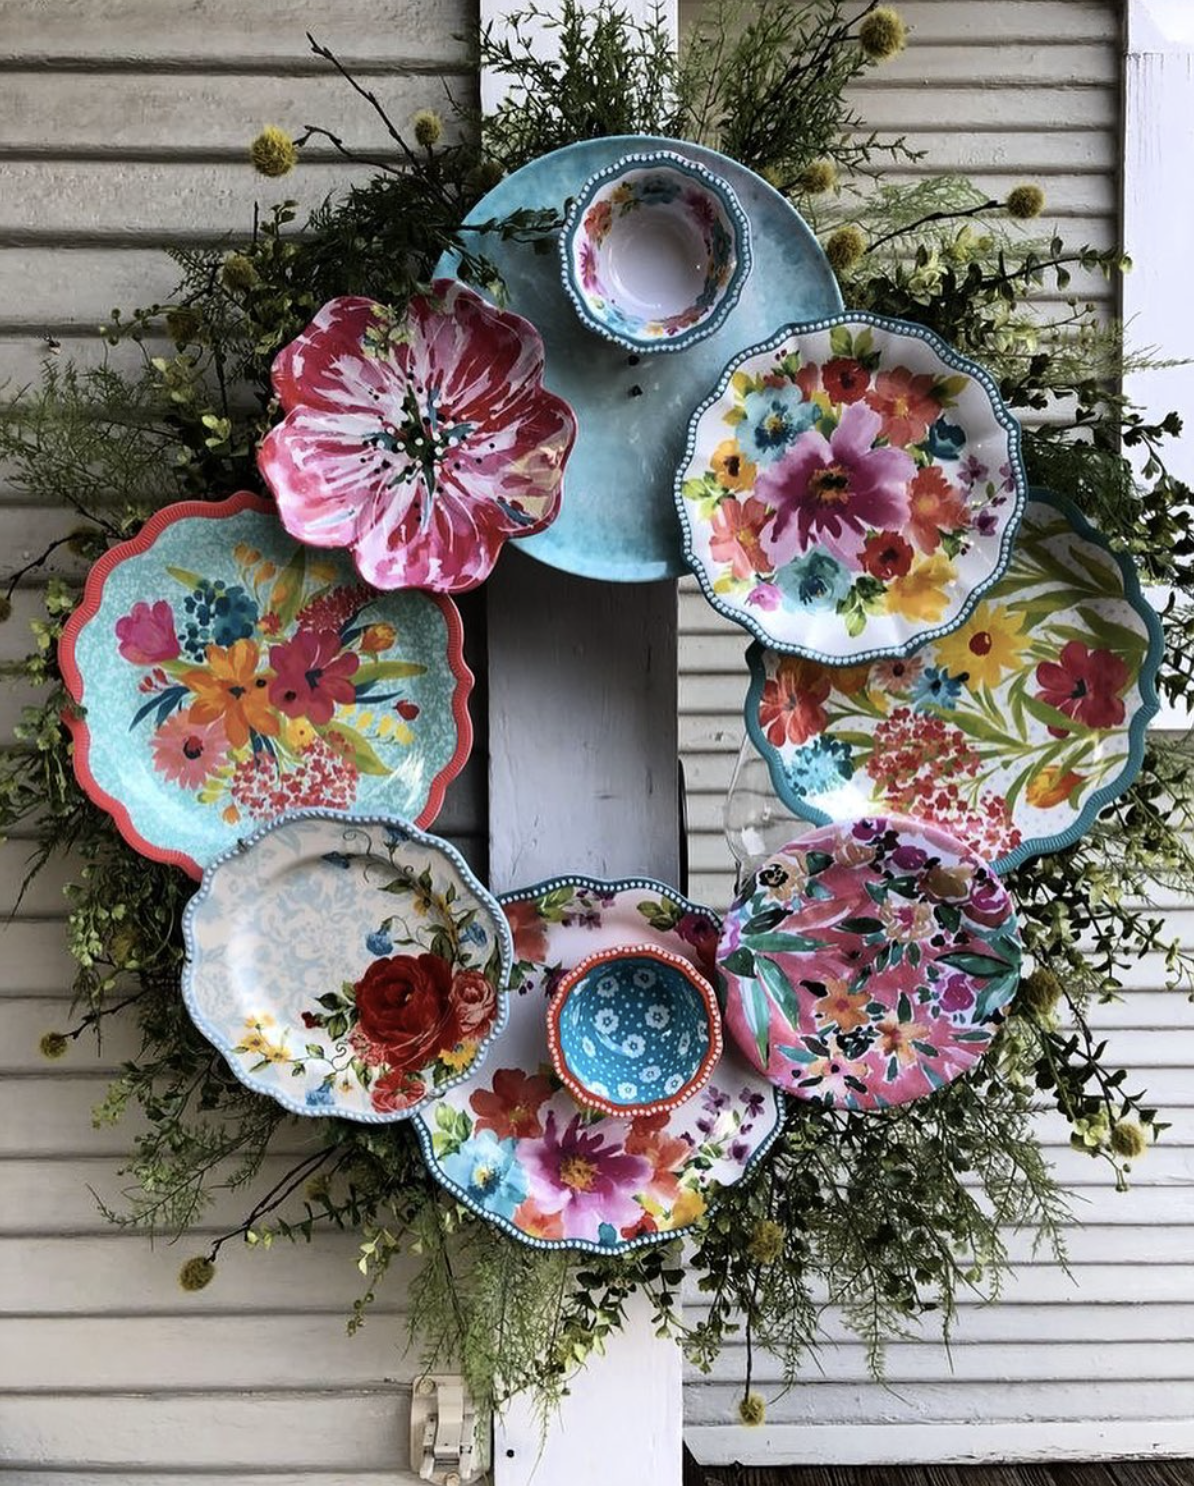
Here is another gorgeous plate wreath using colorful floral plates perfect for spring …
What a Beautiful Wreath and what a great idea. Thank you for sharing it. I would love to have one of these plate wreaths in my dining room. And yes, a Christmas plate wreath would be lovely!
I am smitten!!!!
me too!
I may have to make one for Christmas Diane!
This is an awesome and beautiful project!!!!!
Thanks so much for sharing:)
So glad you like this wreath Maria!
Thank you for sharing! Such a clever and beautiful idea!
I love it Lisa!
Your talent is beyond measurel.Plate wreath is unique, very pretty!
Beautiful! Clever, so different and
a must try. Thank you for sharing your great ideas!
Really love the wreathes. I might try decorative paper or melamine dishes for a less expensive alternative.
Great idea Carolyn!
I made this, but sooo heavy. I had to end up leaning it on a mantle!
When I do again I will use melamine/plastic plates!
I think the key is to use smaller, lighter dessert plates and saucers but your idea of using plastic is great!
Beautifully done!
Thank you
So glad you love this plate wreath Constance!
This is simply beautiful.
I love that any color can be used for a unique look!
Beautiful
So glad you love the plate wreath Ruby!
Love this. Thank you for sharing.
Glad you love this fun plate wreath Donna!
I have a small collection of bone dishes (crescent shaped) that I would like to try this project. Do you think the plate hangers would fit bone dishes?
Beautiful! Only question is What are butter pats? Thanks for sharing.
Hi Dee – butter pats are very small plates used to serve slices of butter 🙂
This is a wonderful idea!! Someday I will make a Christmas plate version!! Thank you so muc
A Christmas plate wreath would be fab Carrie!
Your wreath is beautiful – but I could NOT get it to work for me! I tried and tried, thank goodness I did not use cherished plates that would have broken! It is also very heavy if you use china pates and can get them to stay put to try to hang!
Oh no Betty sorry it did not work for you!
Absolutely the most beautiful plate wreaths I have ever seen! Such talent! Thank you for sharing.
Anita Ford
So glad you like these creative wreaths Anita!
Such a pretty and unique idea!
Very nice! I love pretty dishes and long to purchase at yard sales and thrift shops. Now I have a reason!
Such a good use of old dishes Nancy!
I love Suzanne’s ideas too! Thanks for reminding me that I want to create this one Kelly!
Send me a pic when you do!
You don’t show how to attach the little plates. I don’t understand the command hook placement. Thank you for sharing.
This is such a neat idea!