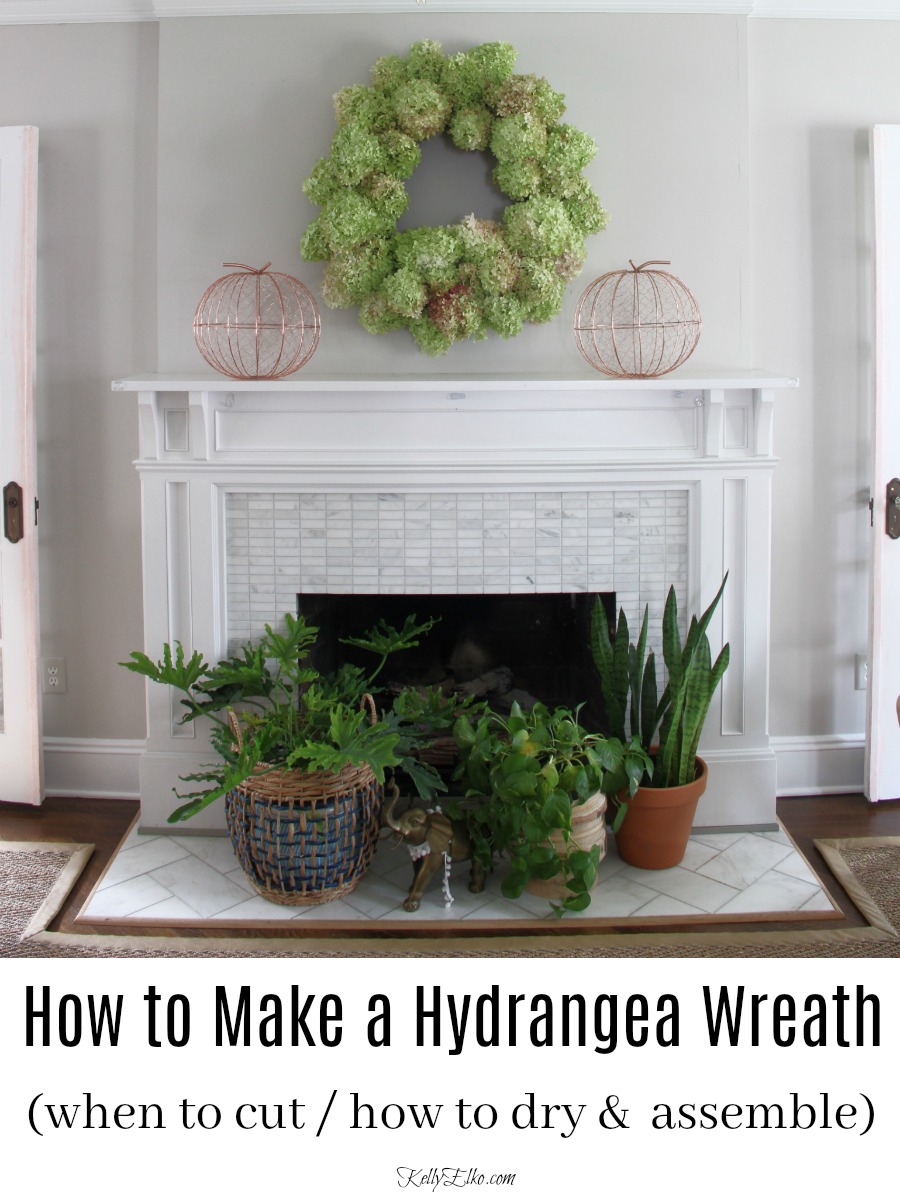
Gargantuan DIY Limelight Hydrangea Wreath and Fall Mantel
I’ve got over 25 different types of hydrangeas in my yard so it’s about time I used them to make a wreath! I’m sharing how to make a DIY limelight hydrangea wreath (or any variety of hydrangea wreath for that matter). My tips and tricks will help you to create this show stopping wreath that you can display all year round.
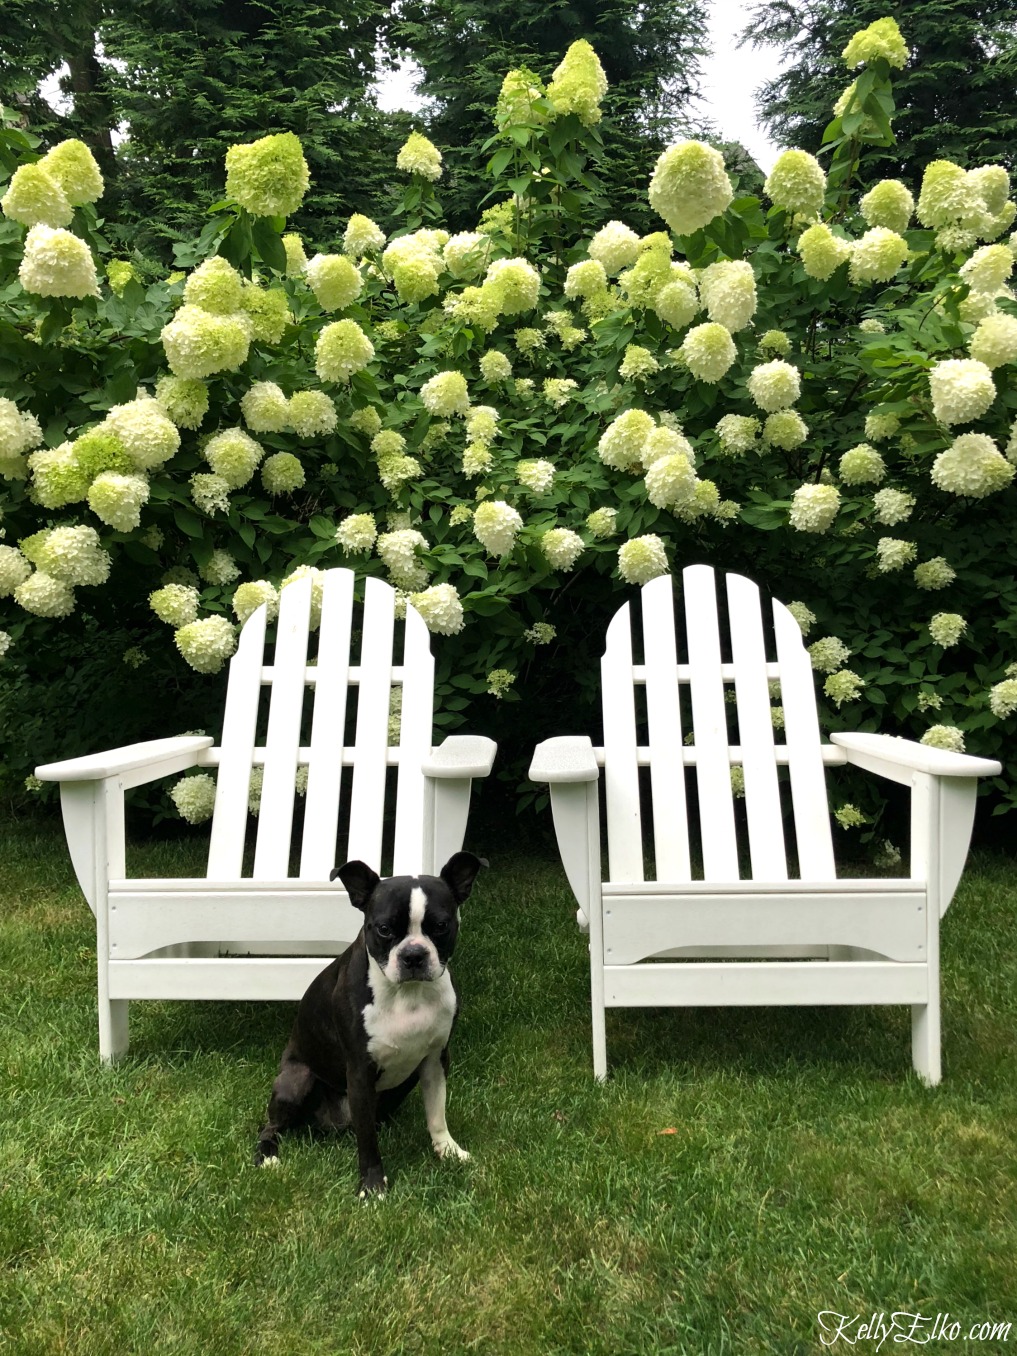
If you have a sunny spot in your yard, limelight hydrangeas will thrive in zones 3-9. I have 25 hydrangeas in my yard and seven of them are limelights which are by far the easiest, most low maintenance of all my hydrangeas. They more than doubled in size the first season and now they are well over eight feet tall!
DIY Hydrangea Wreath
Be sure to cut your hydrangeas correctly to be sure they bloom next year. You can read my hydrangea pruning tips here.
When it comes to drying hydrangeas, timing is everything!
Do not cut blossoms when they are at peak color! You need to let the flowers start drying on the bush. When the blooms begin to feel papery and their color begins to change, they are ready to be cut.
Take a bucket of water into your garden and cut blooms so they have at least 8″ of stem. Immediately put them in the bucket of water.
Use my easy flower drying method to dry your hydrangeas indoors. Make sure you don’t crowd the blooms in the vases as each flower needs air circulation to dry.
How to Dry Hydrangeas the Easy Way
post contains affiliate links
When your blooms have dried, it’s time to make your wreath.
Use your largest flowers to create a ring around the outer edge of a grapevine wreath form (see photo below). I like using a grapevine wreath the best because I don’t have to use any glue or wire to adhere the flowers.
Shove the stems through the wreath form and pull on the stem to make sure they are snug as possible. When you have the entire outer ring complete, cut the stems so they only stick out about an inch or so from the wreath form.
Note: my grapevine wreath is 20″ which is HUGE and needed a ton of flowers to complete (about 40 – 50). Make sure to use the right size wreath form so you don’t run out of flowers.
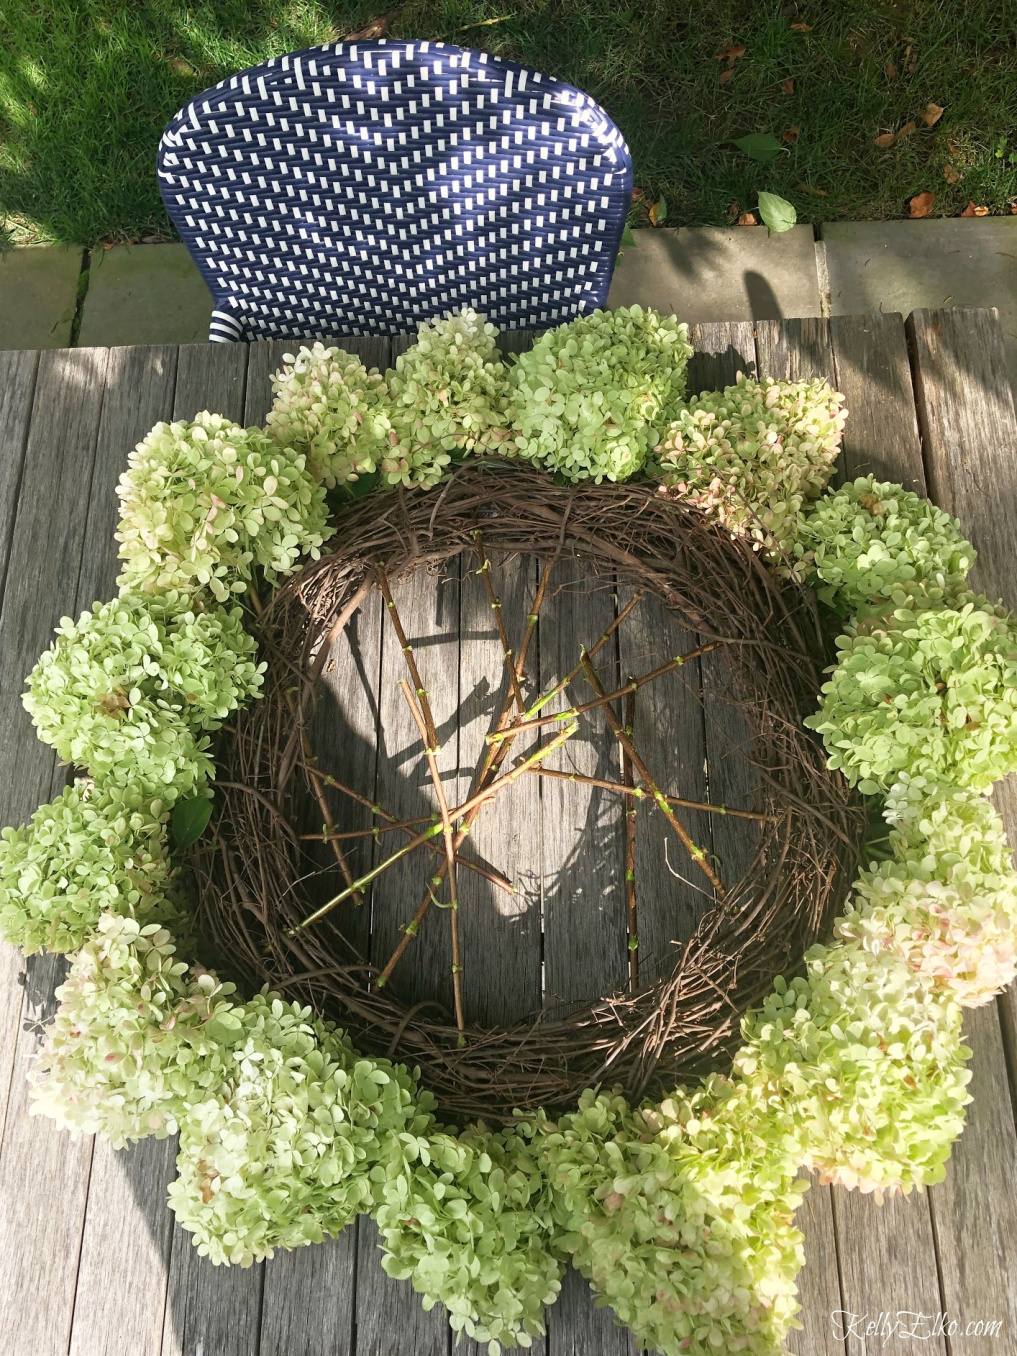
Work outdoors if you can because this is a messy job! I like to hang the wreath on something so I can make sure my arrangement is as symmetrical as possible.
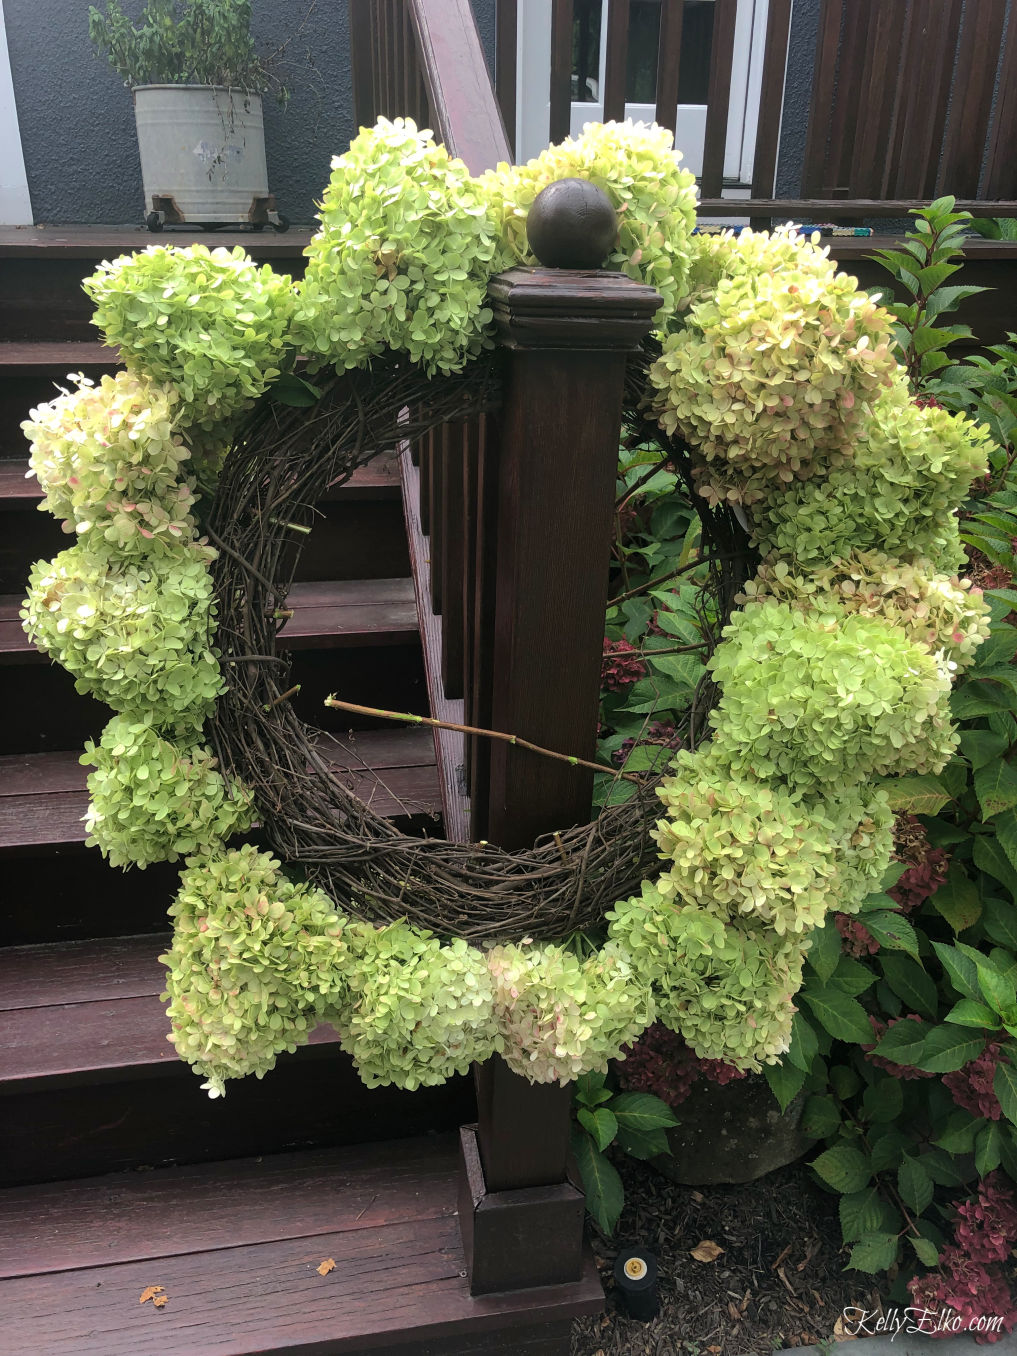
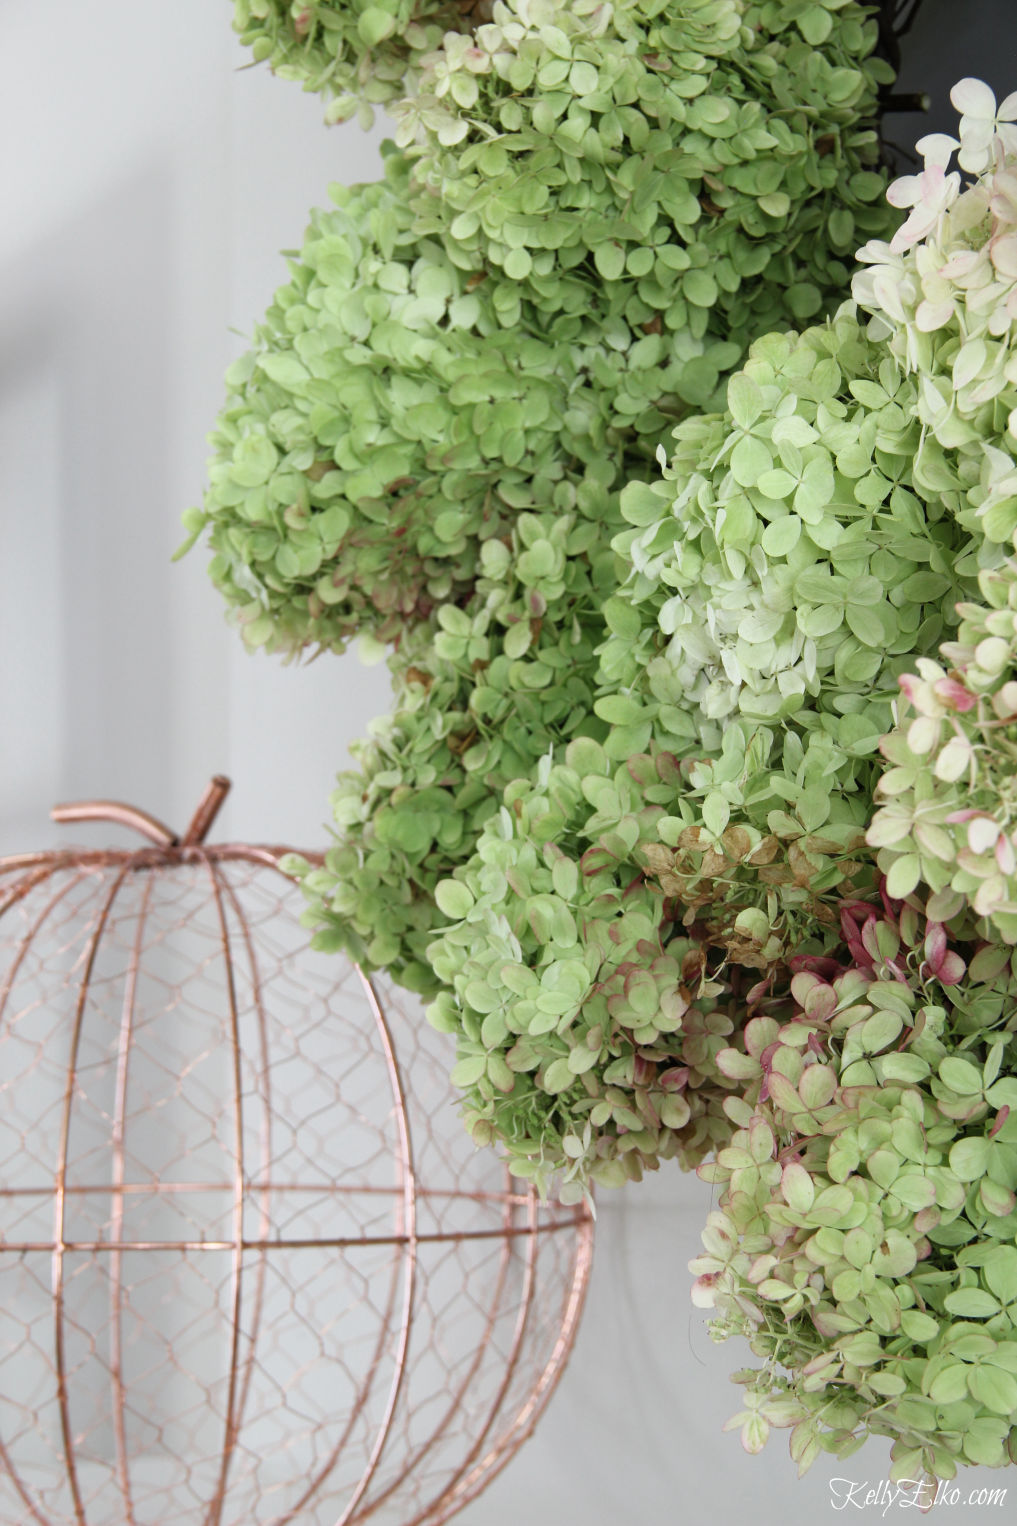
Once the outer ring is complete, start adding blooms to the front of the wreath. Once again, when you have finished adding blooms to the front circle, cut the stems so they stick out about one inch from the wreath form.
When you’re done with the second row, you may need to fill in some bare spots.
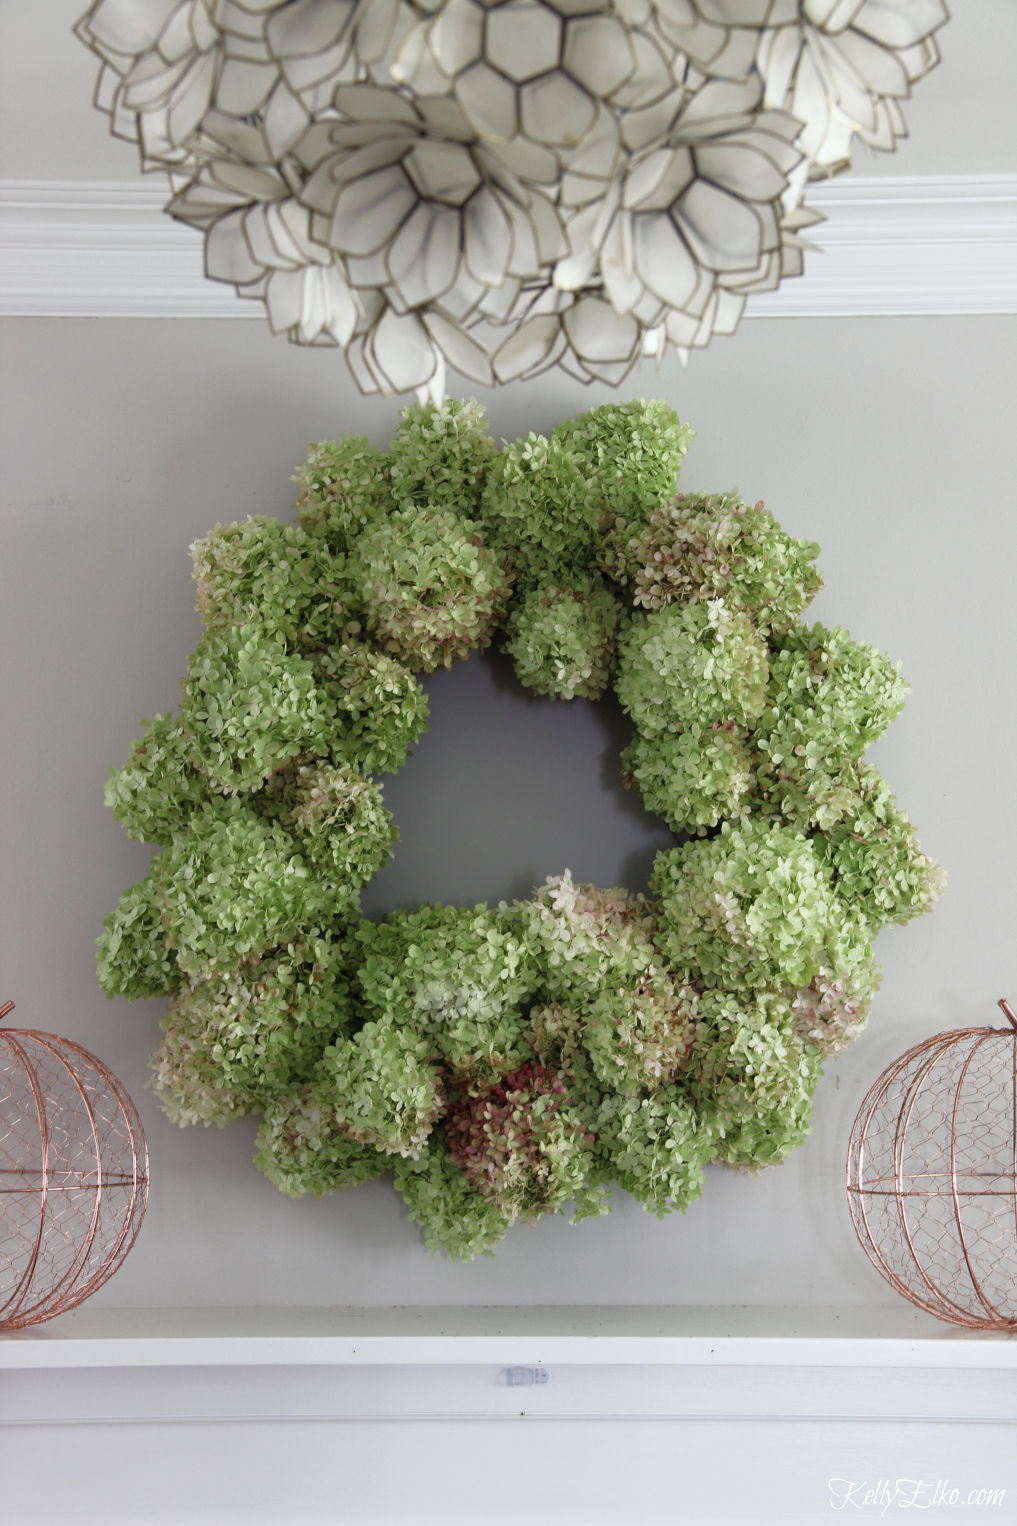
Ta-da! The finished product is a real wow!
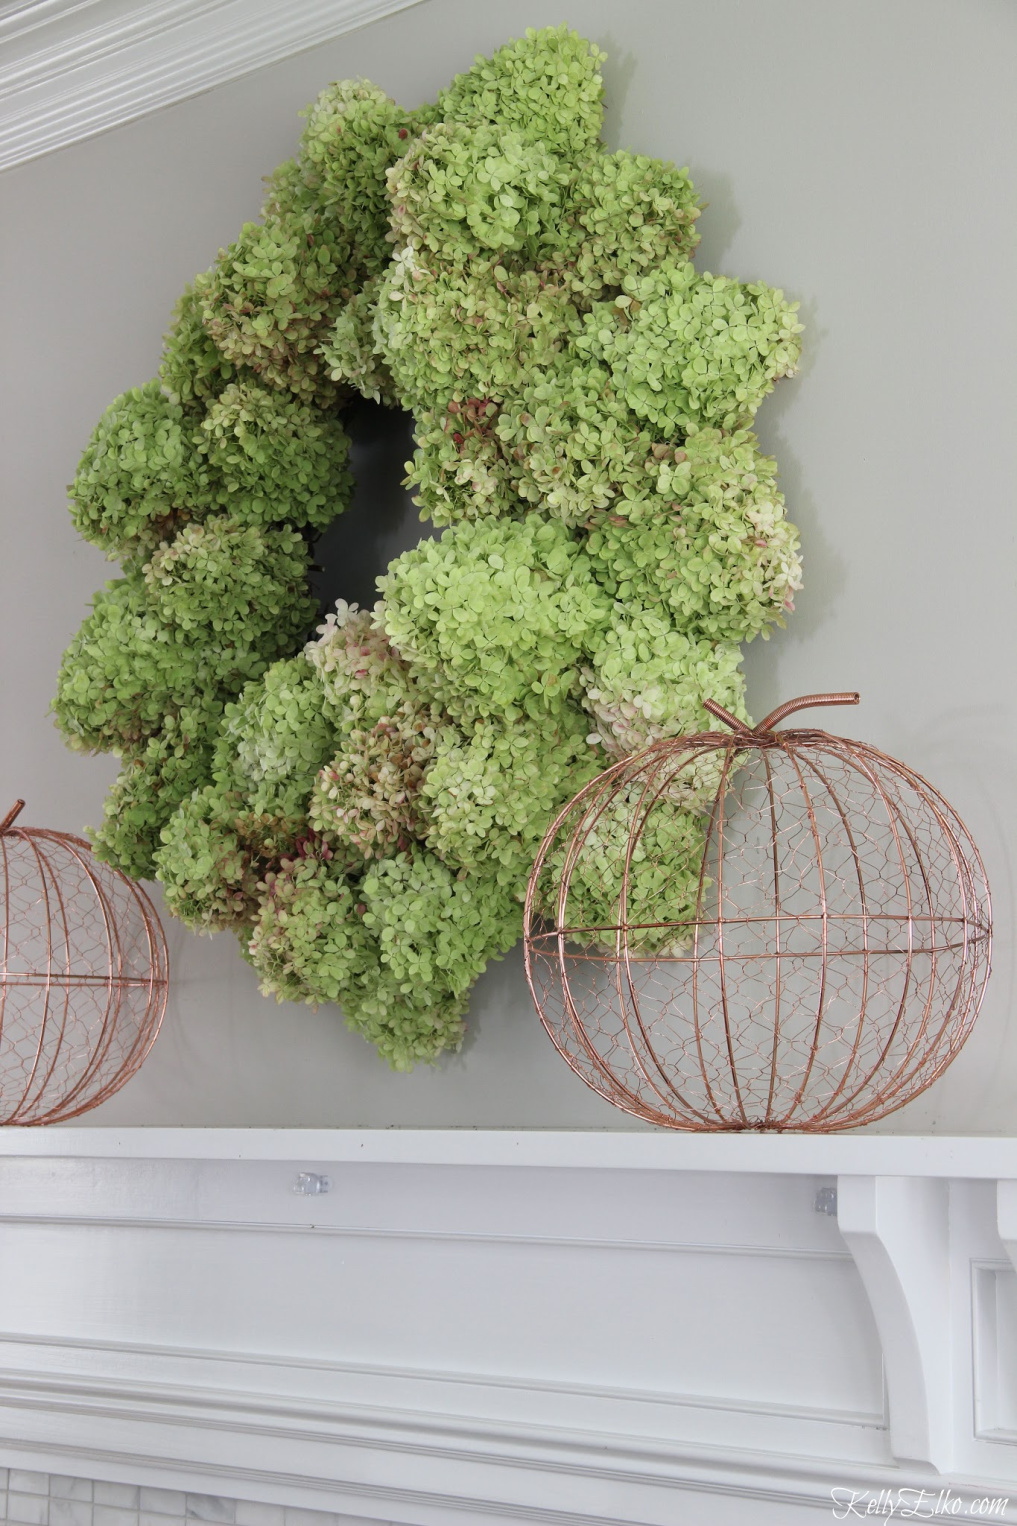
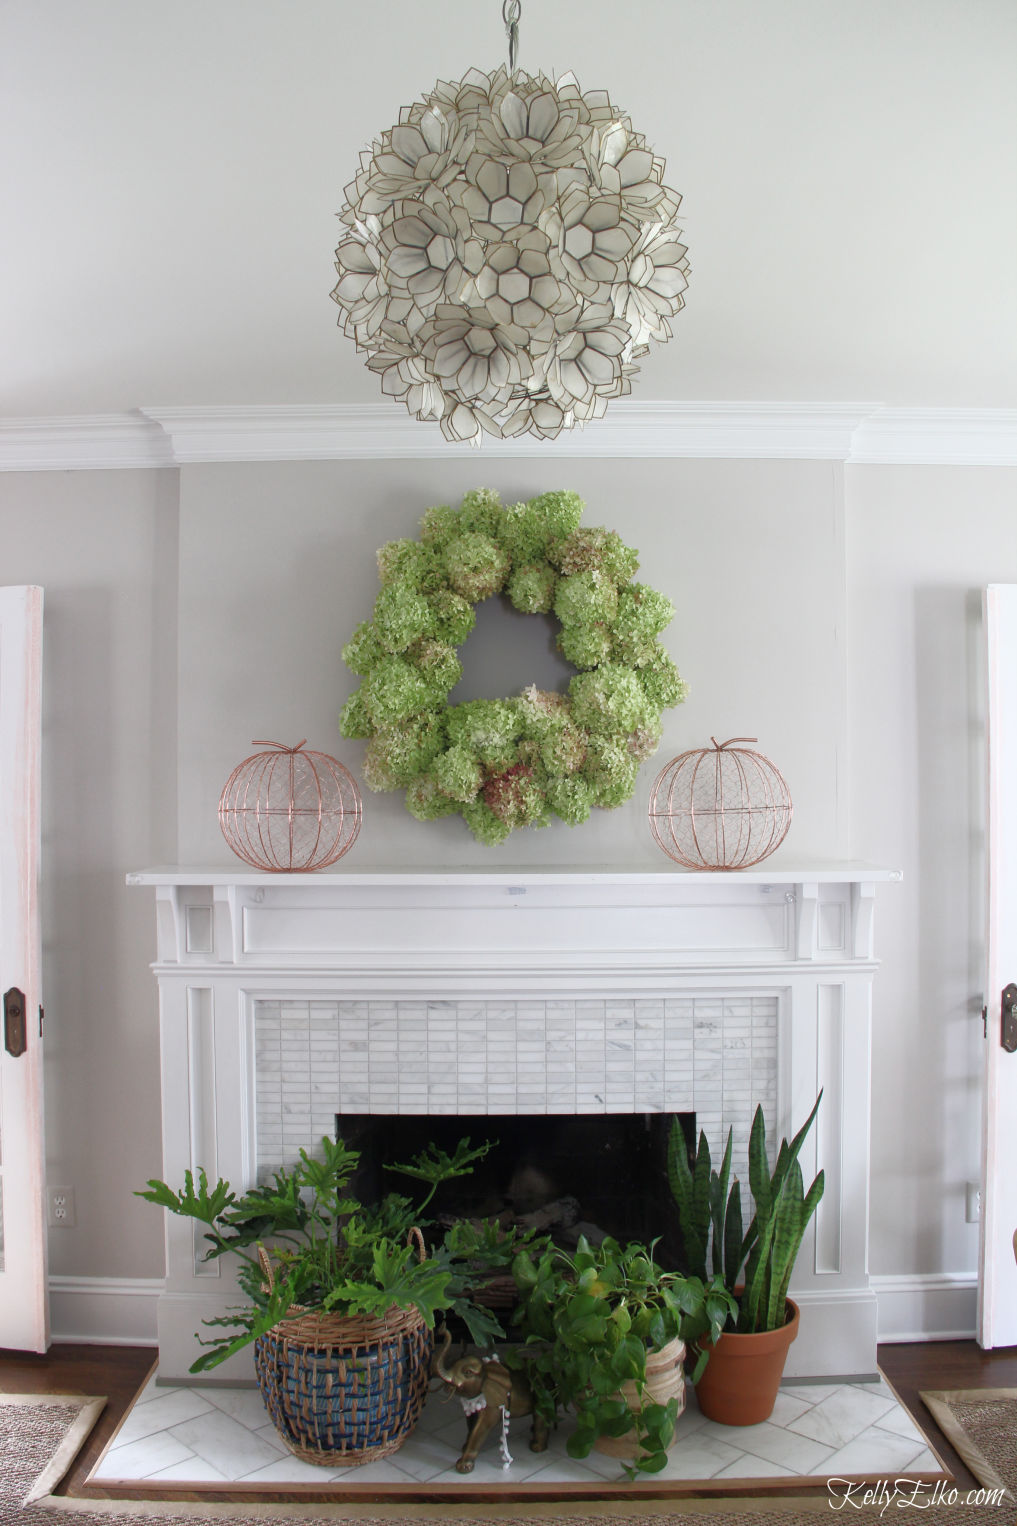
My fall mantel doesn’t need much with this beauty as the focal point!
Fall is my all time favorite season so be sure to check out all of my fall decorating ideas here.

I love the way the wreath looks with my capiz shell chandelier! I bought this over 10 years ago and it’s still a favorite. You can find a similar capiz chandelier here but it needs to be hard wired.
My limelights in all their glory. Make sure you don’t cut them to dry at this stage. Remember, wait until they start feeling papery and changing color.
I can’t believe it took me this long to make a hydrangea wreath! Have you ever made one?
This is beautiful Kelly! I think you are so creative. I love the pumpkins too. I love using grapevine wreaths. I think they are beautiful even plain. Thank you for the inspiration!
I do love the look of a plain grapevine wreath too! Happy Fall Lisa!
It’s a beautiful wreath!! I love that they’re in the soft green color..
I really love the color of Limelights!
Really beautiful. Unfortunately my limelights are in semi shade and don’t bloom like yours do. I do have a wreath from a local shop that I bought several years ago that looks like the real thing. I enjoy it each year.
I love the ceiling light showing in the photos. Can you give me some information on it and where I might find one?
I love a good faux wreath! I love my capiz shell light – you can find it here: http://bit.ly/2A7zUDB
Thanks for the information. Is yours hardwired? It says it has an on off switch on cord. That seems strange for a ceiling light.
Hope your back is better. I had spinal fusion last year and have started having problems with it and my surgeon has said I will have to have to have more surgery. So be careful and follow the BLT rule better than I have.
Oh yes – this one does! You would have to have it hard wired. Sorry you have to go through another back surgery! It’s the worse!
That is beautiful! You have inspired me!
That’s great Natalie – if you make one I’d love to see it!
Your wreath is beautiful. I’m drying some to use in my granddaughter’s wedding. My friend gave me almost all the blooms on her bush! Her shrub is Hugh also.
Lucky you! Congratulations on your granddaughter’s wedding – how proud you must be!
Beautiful Kelly!
I have read your article about Hydrangea care. I just need you to tell me about my Blue Nikko plant.
How much should I trim it in the fall. I have one flower on it this year and it is not a full flower. I only cut it back about 5″‘ last fall. Help…what am I doing wrong?
Thank you for any helpful tips.
Catherine Ellsworth
You don’t have to trim your hydrangeas and cutting 5″ in the fall should not effect them at all! Unfortunately, especially with Nikkos, spring frosts kill the buds which means no blooms. It’s happened to me!
Thank you Kelly. I appreciate your fast response. I am not going to cut it back this fall and see what happens.
By the way, was your home going to be in a magazine this month?
Catherine
Yes – I’ll be in the December issue of Better Homes & Gardens!
that turned out so well! it’s huge and awesome!
I like big wreaths and I cannot lie!
Your hydrangeas are beautiful and you are very clever to make a wreath out of them,guess just because physically you couldn’t do much your brain must have been busy,lol! I’m glad you are doing better. Your home is so pretty, can’t wait to see what you do.
LOL Marlene – my brain is in overdrive!
SO Gorgeous! I have never tried to dry out flowers. I feel like I’m just not that patient. It looks so perfect for fall. Such a nice way to enjoy those blooms for the fall season. I also love those copper pumpkins too! Simple but beautiful. Hope you are doing better! Thanks for sharing!
Thanks Hope! The best part about my drying flower method is you can forget about them til they dry!
Now THAT’S a wreath! I didn’t even know there were that many varieties to be had.
Not 25 different varieties – 25 hydrangea bushes (I think I have 4 varieties).